My quick verdict: You can build a reusable AI video editing workflow with Async Skills by saving your preferred editing style and applying it to future videos. I tested my custom Skill on two different tutorials, and both kept the same subtitles, zoom-ins, and video format. The second needed a few extra adjustments, though, so I'd recommend testing your Skill on several videos before finalising it.
You can save your editing style in Async as a Skill and reuse it whenever you’re working on a new video. This means your usual editing preferences, from pacing to subtitles, can become part of an AI video editing workflow that you can come back to for future projects.
If you’re someone who’s recording similar videos regularly, this is something that will come in handy. As your own video editor, you probably already know how you like your content to be edited, and repeating these instructions every time to AI can get a bit annoying.
So for this article, I decided to solve this problem by walking you through my own AI video editing workflow step by step. I’ve picked a video from Async’s own YouTube channel, and the plan is to use it to explore three different Skills, including creating my own editing style.
I’ll also look at what can be done manually when your edit needs a little more attention. Let’s get started!
What is an AI video editing workflow?
An AI video editing workflow is a process where AI handles some of the work involved in editing a video. Depending on the editor, that could mean finding the best moments in a recording, cutting unwanted sections, or just adding subtitles.
By the way, if you're still deciding which AI editing workflow works best for you, I've also tested text-based vs. chat-based video editing on the same footage to see how the two compare.
Let’s say you run a YouTube channel for your online business, where you post a tutorial every week. By the time you publish your third or fourth video, you’ve probably already established a consistent editing style that works for you. This could be something as simple as always keeping your intros exactly 10 seconds, or something a bit more complicated, like zooming in on your face every time you start talking about your product’s pricing.
Now, with Async’s AI editing Skills, you can build those preferences into reusable instructions and eventually an AI editing workflow that could cut your editing time in half.
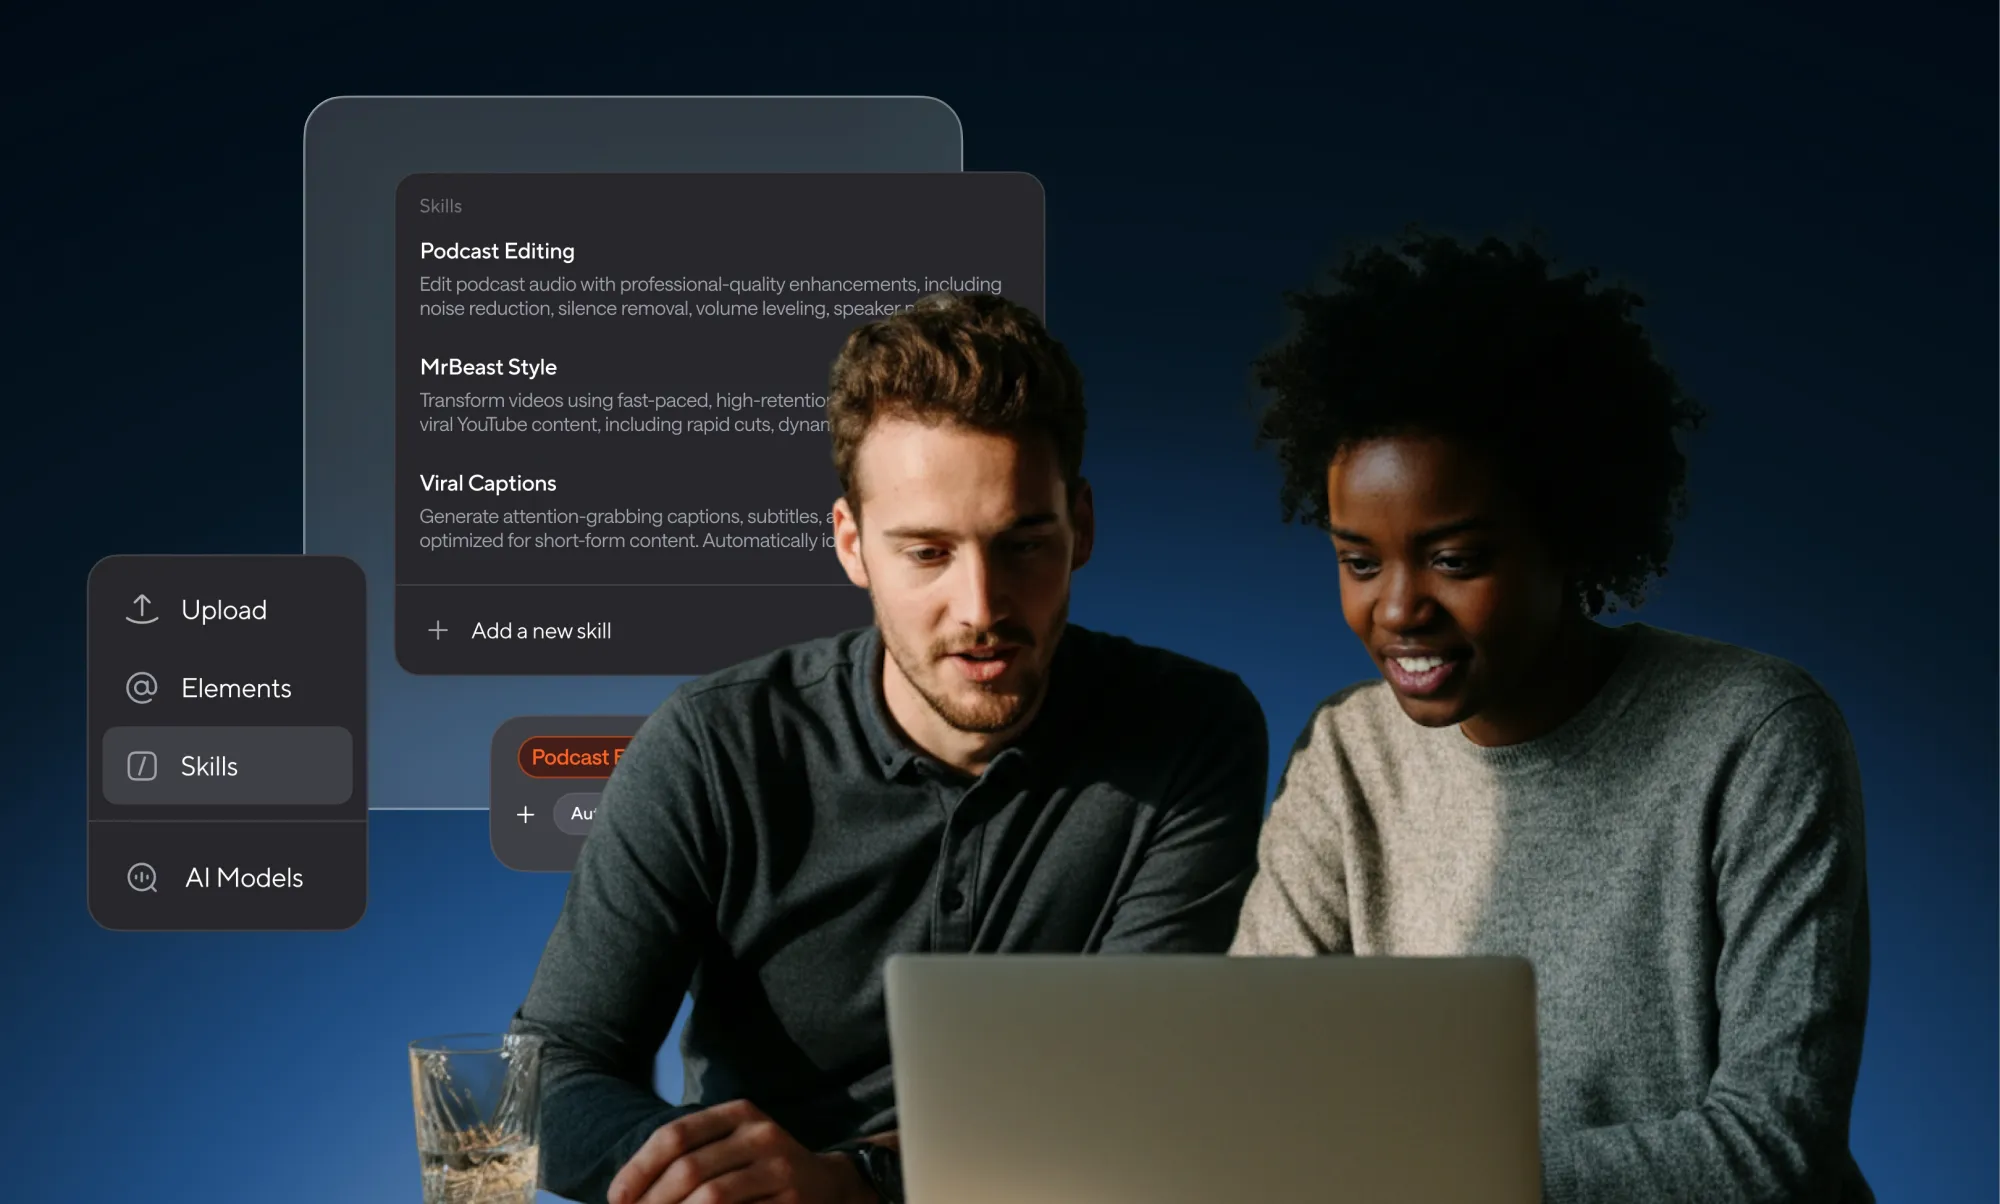
Your skills can contain instructions, examples, files, and even code to help AI Chat perform specific tasks more consistently. You can choose one of Async’s existing Skills or create your own. And that’s what we’ll focus on here.
How I Tested Async Skills to Build a Reusable AI Video Editing Workflow
For this project, I’ve picked our own tutorial: “The ONLY Async Tutorial You’ll Need!” You can quickly skim through it here:
Now, I picked this one because there’s enough content to work with. It also has a few distinct tutorial sections, so we can experiment with creating shorter videos from the same original recording. Here are the three Skills I want to try:
- Video Highlights: Find useful moments in the tutorial and turn them into shorter clips.
- Custom Editing Skill: Save my preferred editing instructions and use them on those clips.
- Image Generation: Create a thumbnail for one of the resulting videos.
I’m also going to test my custom Skill on a completely different video to see whether it can maintain the same editing style.
How to create an AI video editing workflow in Async
Step 1: Upload your video to Async
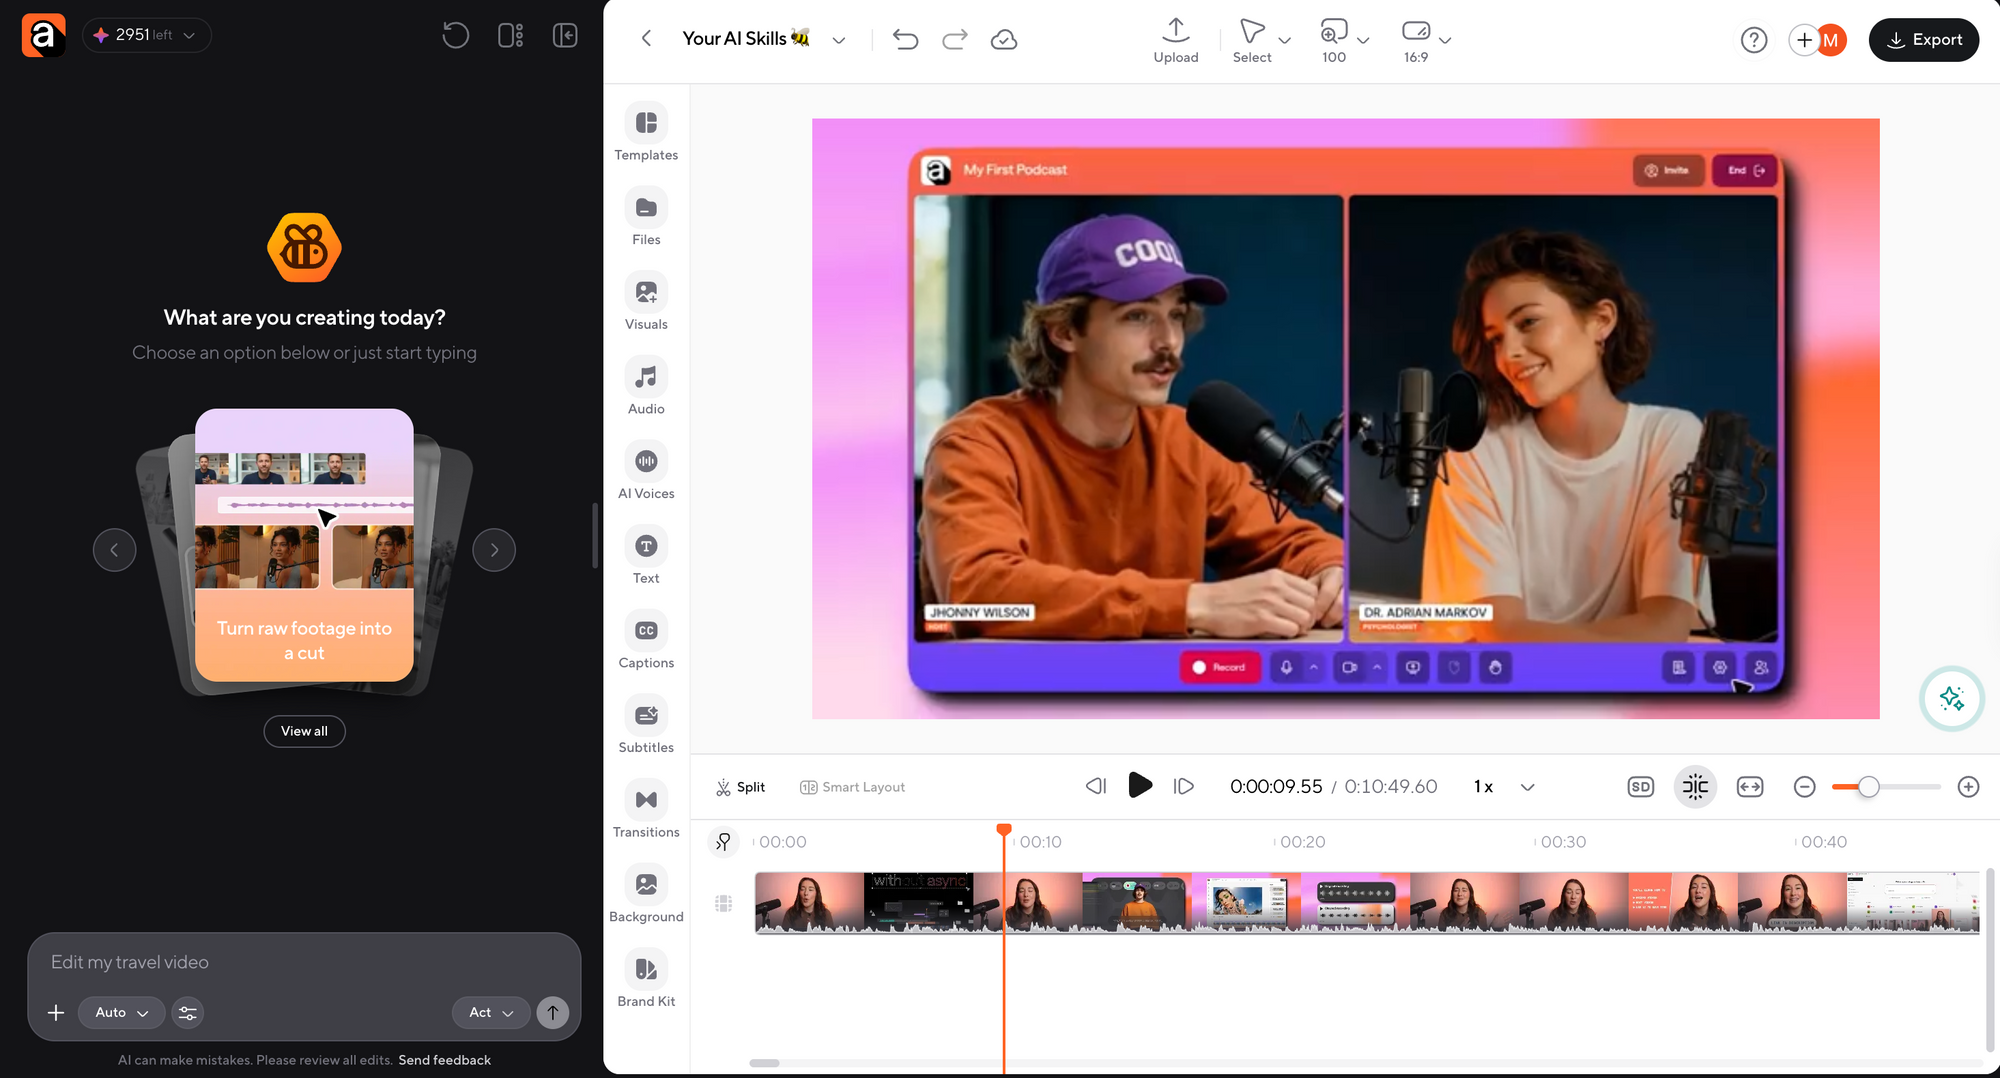
First, we need our video uploaded to Async.
You can do this by selecting Upload in your main dashboard and then giving the editor a quick prompt, something simple like “Let’s start working on this!” It will automatically send you to the chat editor.
You can also go directly to the video editor and upload your footage there.
Now that we have the video in our project, we’re ready to start working with Skills.
Step 2: Find the right Skill in Async
Before we move to the editing part, let’s see where the Skills actually live.
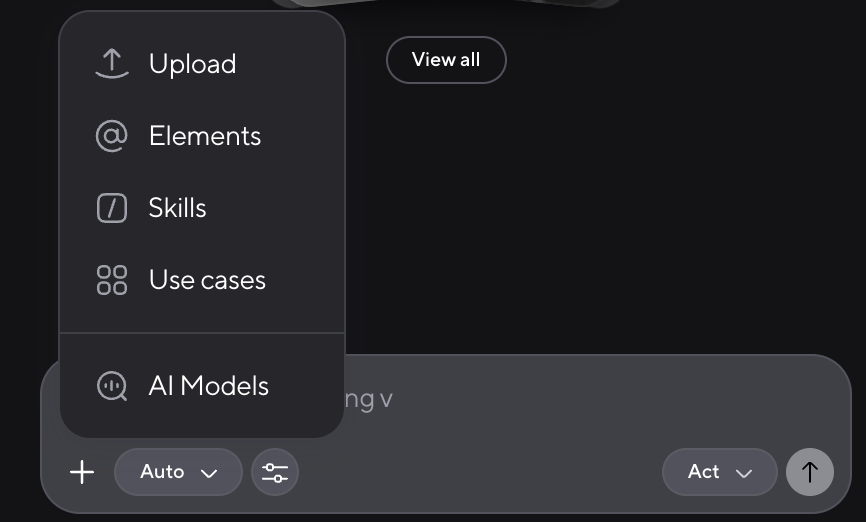
Open AI Chat and click the + button beside the chat input. You can also type / directly into the chat box.
Select Skills, and you’ll see the available options.
There are currently 24 Skills available, including video highlights, image generation, video generation, audio generation, product guidance, and multi-camera editing.
You can also create your own Skill, which we’ll get to shortly.
Step 3: Use the Video Highlights Skill to create short clips
I want to start with the highlight-reel Skill because we already have a longer video with quite a few tutorial sections. The idea is to find parts that can be repurposed into short, standalone videos. For example, the original video has a section about editing footage at around 04:30 and another about adding subtitles at around 07:52. Both could potentially work as separate tutorial clips.
So, I’ll select the /highlight-reel Skill and try this prompt:“Find two useful highlights from this tutorial that could work as standalone YouTube Shorts or Instagram Reels. Focus on practical editing tips. Keep each clip between 25 and 45 seconds where possible, and make sure the explanation still makes sense without the rest of the video.”
Here’s how it started:
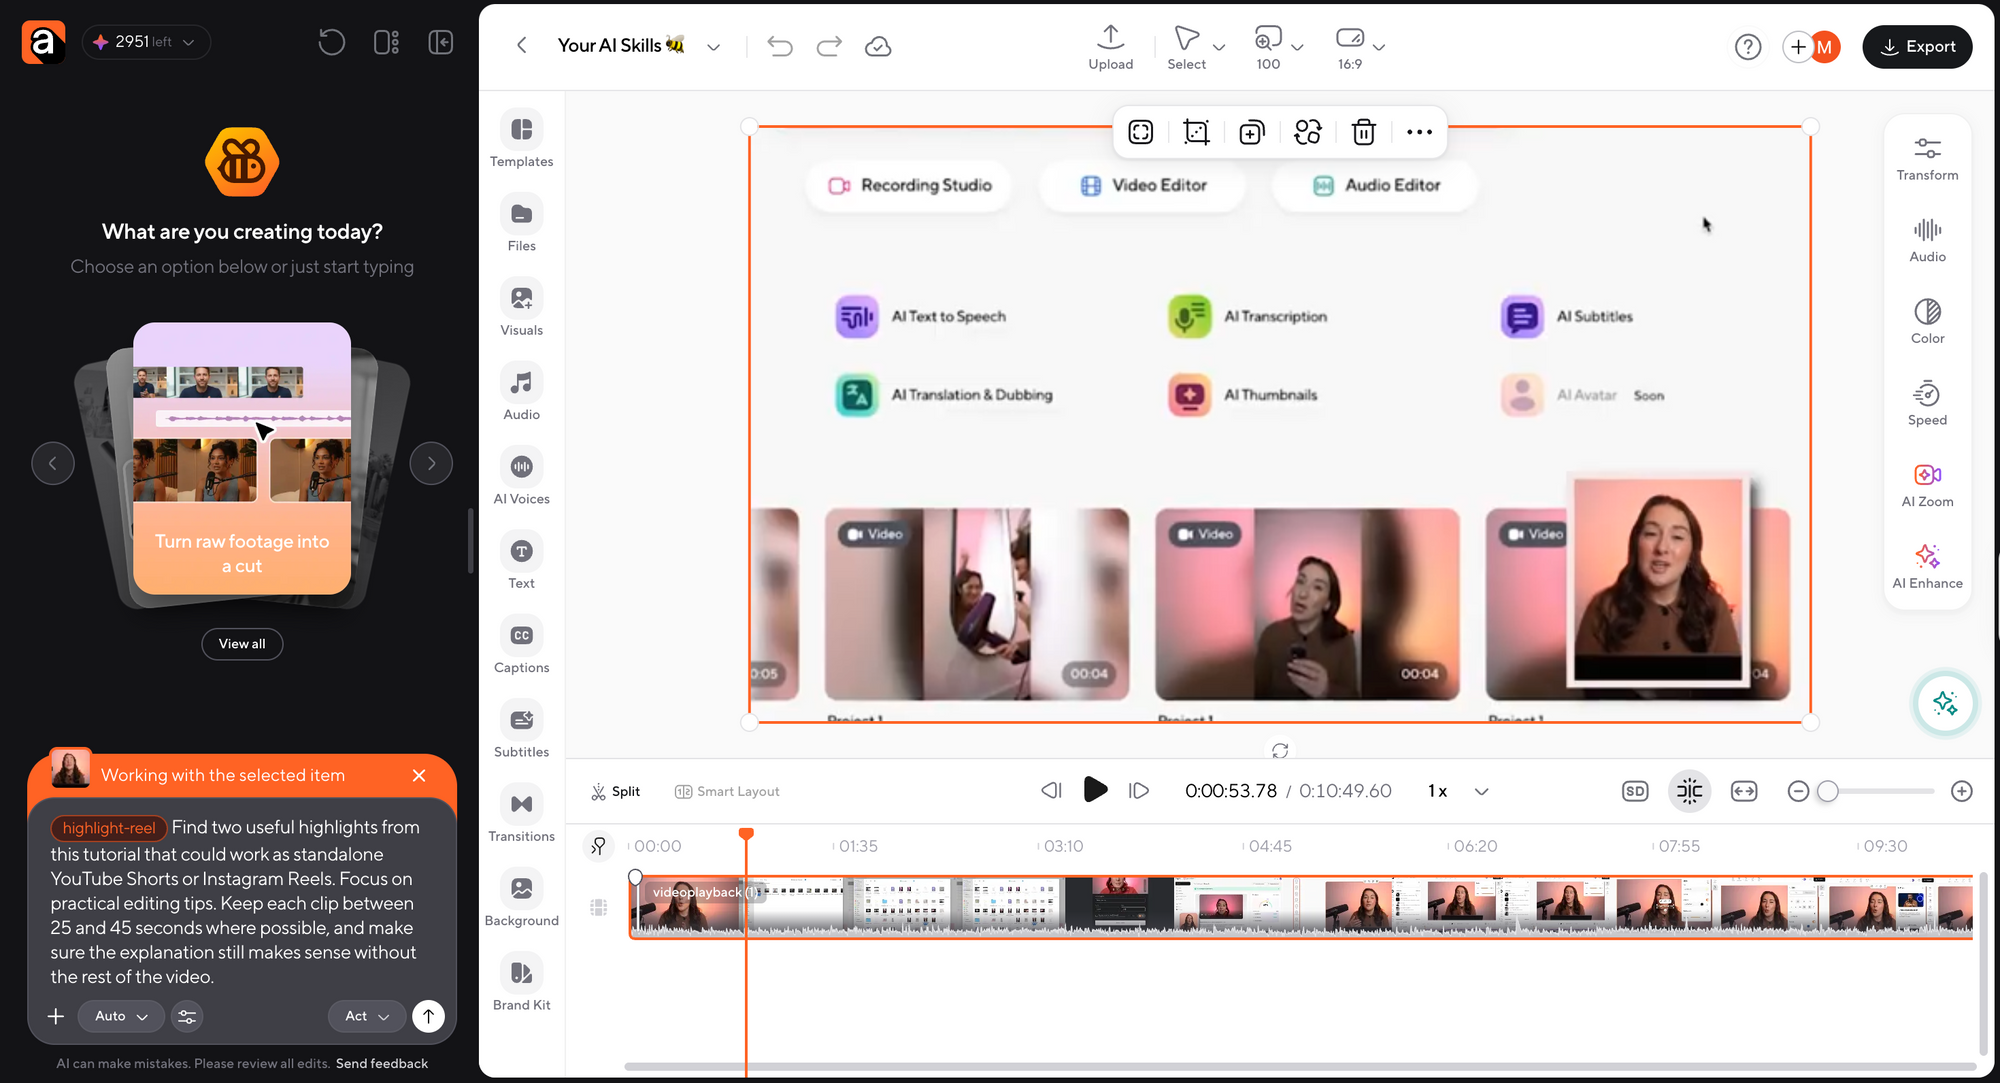
Now, great news! The prompt worked pretty well, as it did give me the most relevant highlights, added interactive subtitles on top, and did an engaging edit with cuts and transitions.
By the way, before it even starts working on your highlights, the chat explains what it’s about to do, and you can easily ask it to either skip some parts of the workflow or add any specific instructions you have in mind.
Now, this is how the first result from Async looked.
Amazing edit, only one slight problem I had: it resized the video to 9:16, but kept the actual footage horizontal and filled the empty space above and below it with a background. For me, this actually works because I prefer this format over zooming in. But ideally, I'd want the background to be a blurred version of the same video, filling the empty space around it.
So I asked our Bumblebee to do it, and this is what we got:
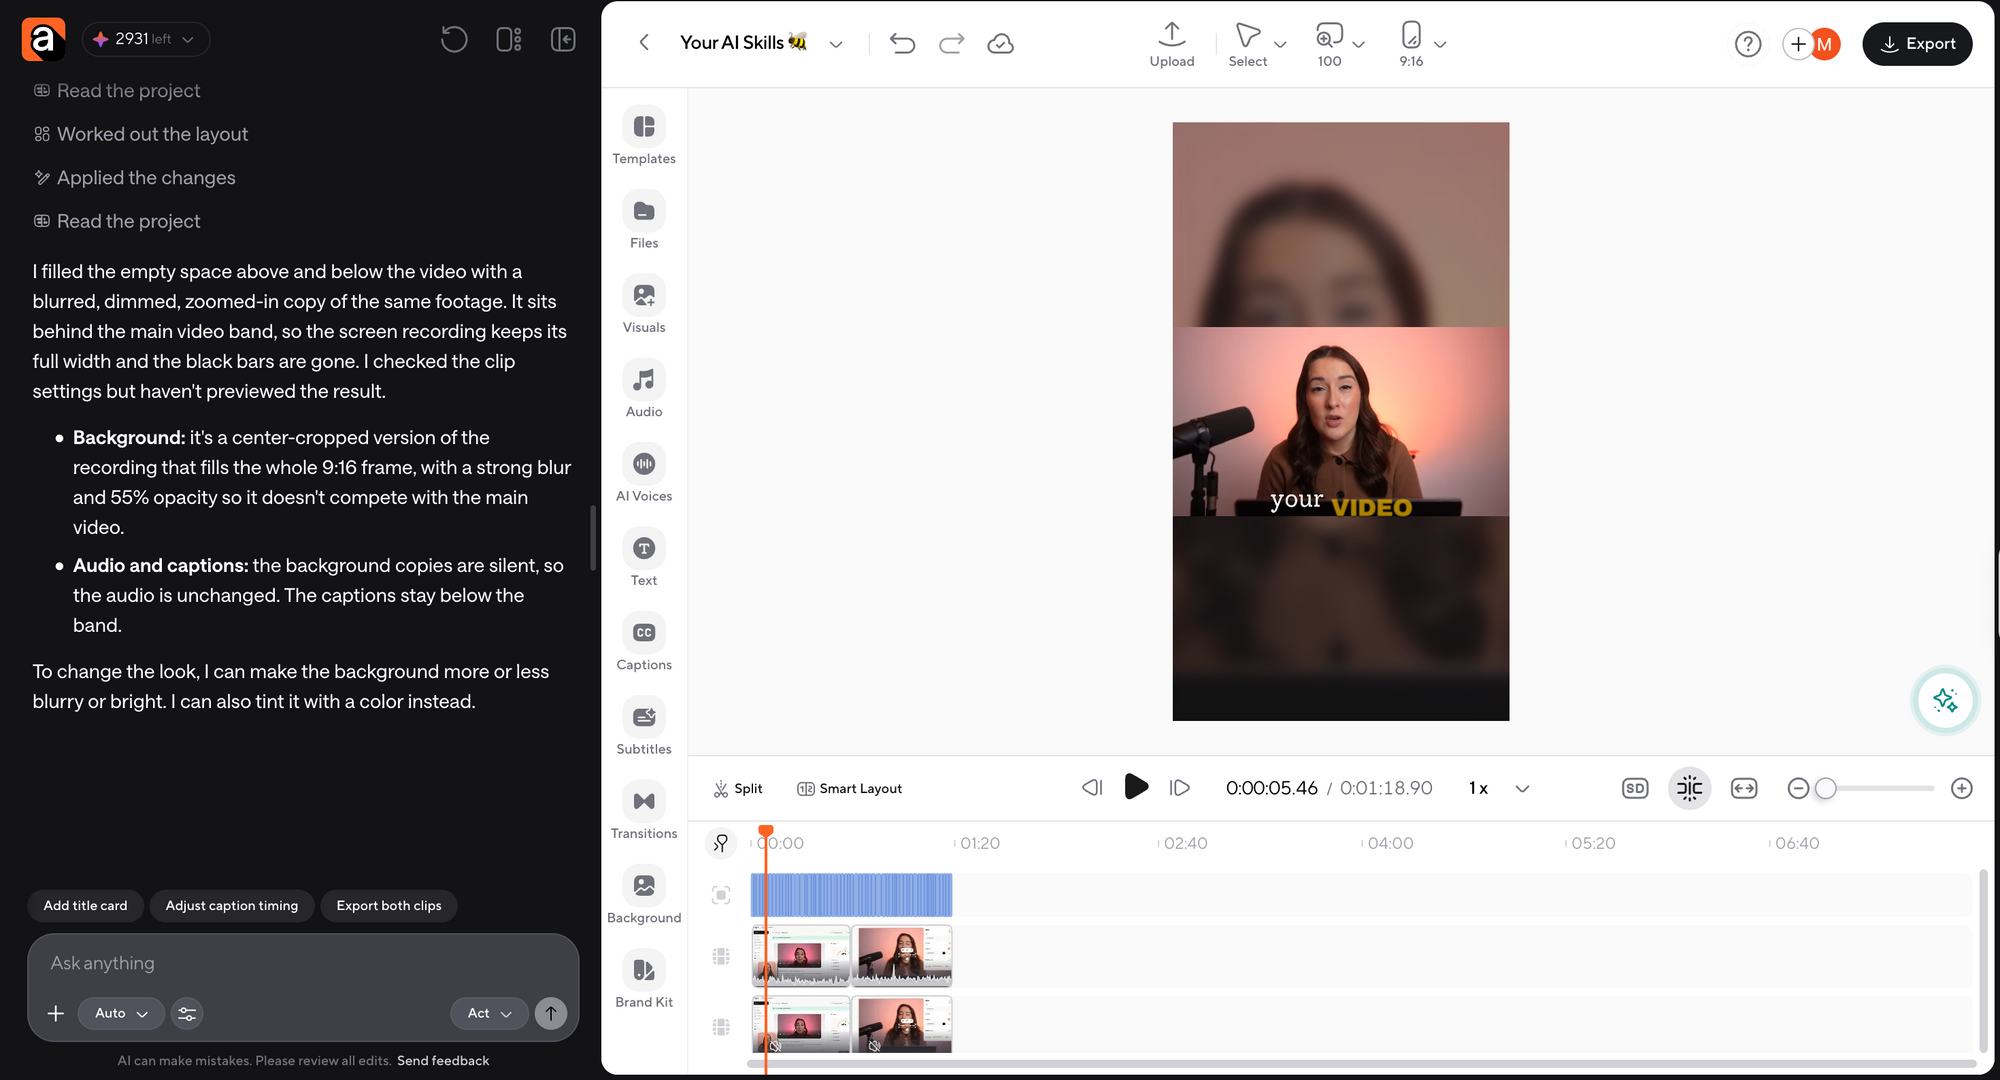
As you can see, the AI editor understood the assignment, as we now have two nicely edited highlights with a pretty trendy look that I can ship to Reels or YouTube Shorts right away.
The only note at this stage is to keep in mind that sometimes you will want to make adjustments to the initial result you’ll get, so just keep chatting and prompting the editor until you get the look you like. This leads us to the next step:
Step 4: Create your own AI editing Skill
Now, this is the part I’ve been particularly looking forward to trying.Finding highlights is useful, but I also want my videos to have a consistent editing style.
Let’s say I decide that my personal editing style for this channel is to use bold yellow subtitles with a black outline, zoom in whenever I demonstrate an important feature, and keep every short clip around 20 seconds long.
So let’s integrate these instructions into a new Skill that can be reused for every Short we create. Go back to the Skills menu and select Add a new skill.
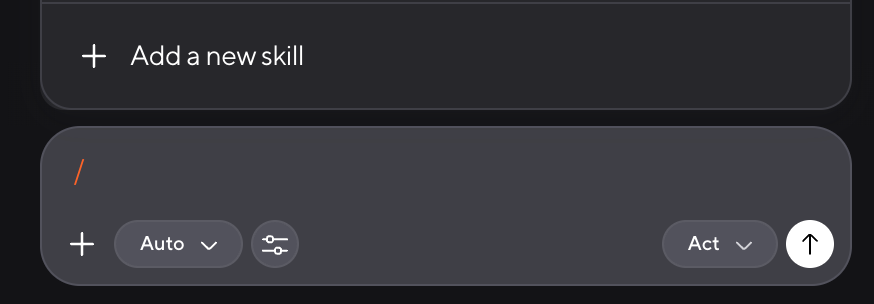
Async recommends giving your Skill a clear purpose, explaining when to use it, and describing the desired output. For this example, I’d call mine My Tutorial Shorts Style.
These are the instructions I want to save:
Custom Skill instructions:
"Whenever I upload a new tutorial, use these editing instructions:
- Clip length: Turn the tutorial into an approximately 20-second short clip. Choose the most useful moment that can stand on its own and keep the explanation clear.
- Subtitles: Add bold yellow subtitles with a thick black outline. Keep them in the same position throughout the video.
- Zoom-ins: Whenever I demonstrate an important feature or click a specific button, zoom in on that part of the screen so viewers can clearly see what I'm doing. Return to the original framing afterwards.
- Video format: Prepare the video in 9:16 for Shorts and Reels. If cropping hides important parts of the tutorial, keep the horizontal footage and fill the empty space with a blurred version of the same video.
Keep this style consistent across all my tutorial videos. If something needs a manual adjustment, identify the problem so I can review it."
I think this is a reasonable starting point for the type of video we’re making. The important part is that the instructions describe the style and the decisions we want the editor to make.
So once you have your Skill saved, it’s time to test it out.
For my project, I’ve selected my skill and prompted the editor with this instruction: “Turn our original tutorial into a 20-second YouTube Short using my saved editing style. Pick the most useful moment that can work as a standalone clip and apply all the instructions from my Skill.”
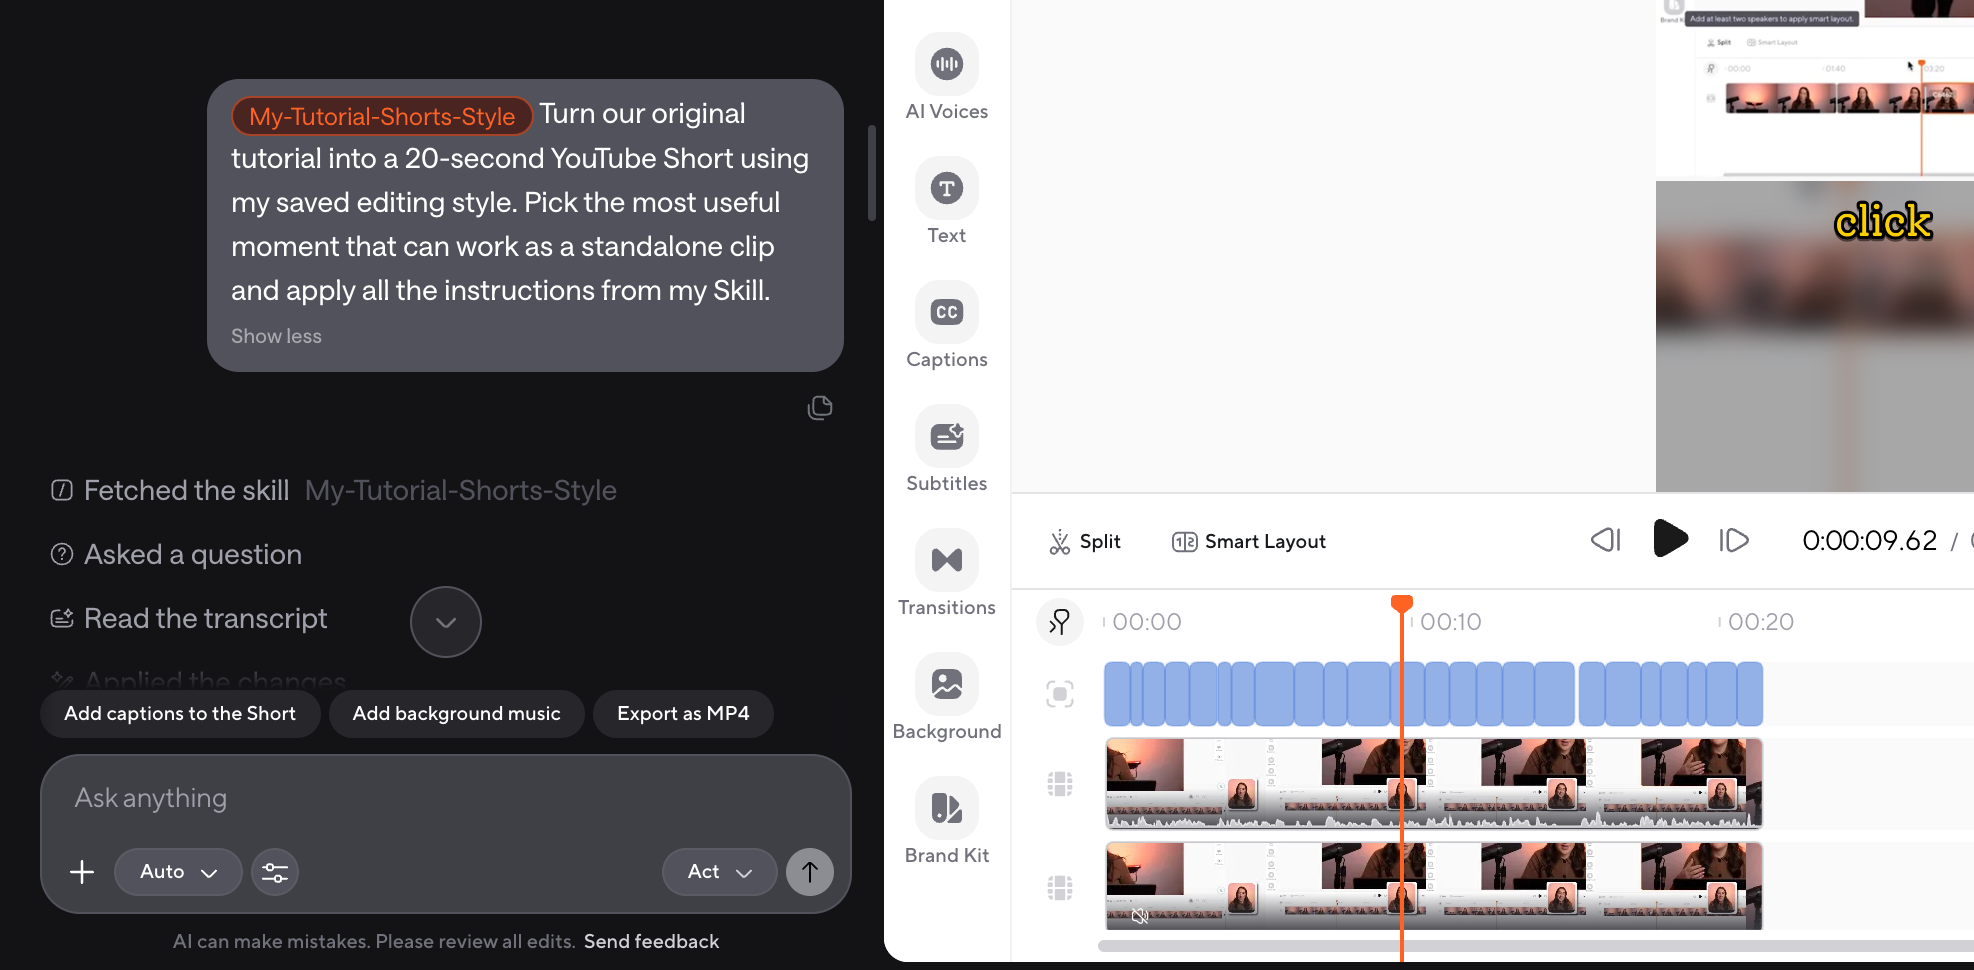
The best part about Async’s editor is that once it finishes the task, it gives you a quick overview of the edits it made and points out anything you might want to double-check or adjust yourself.
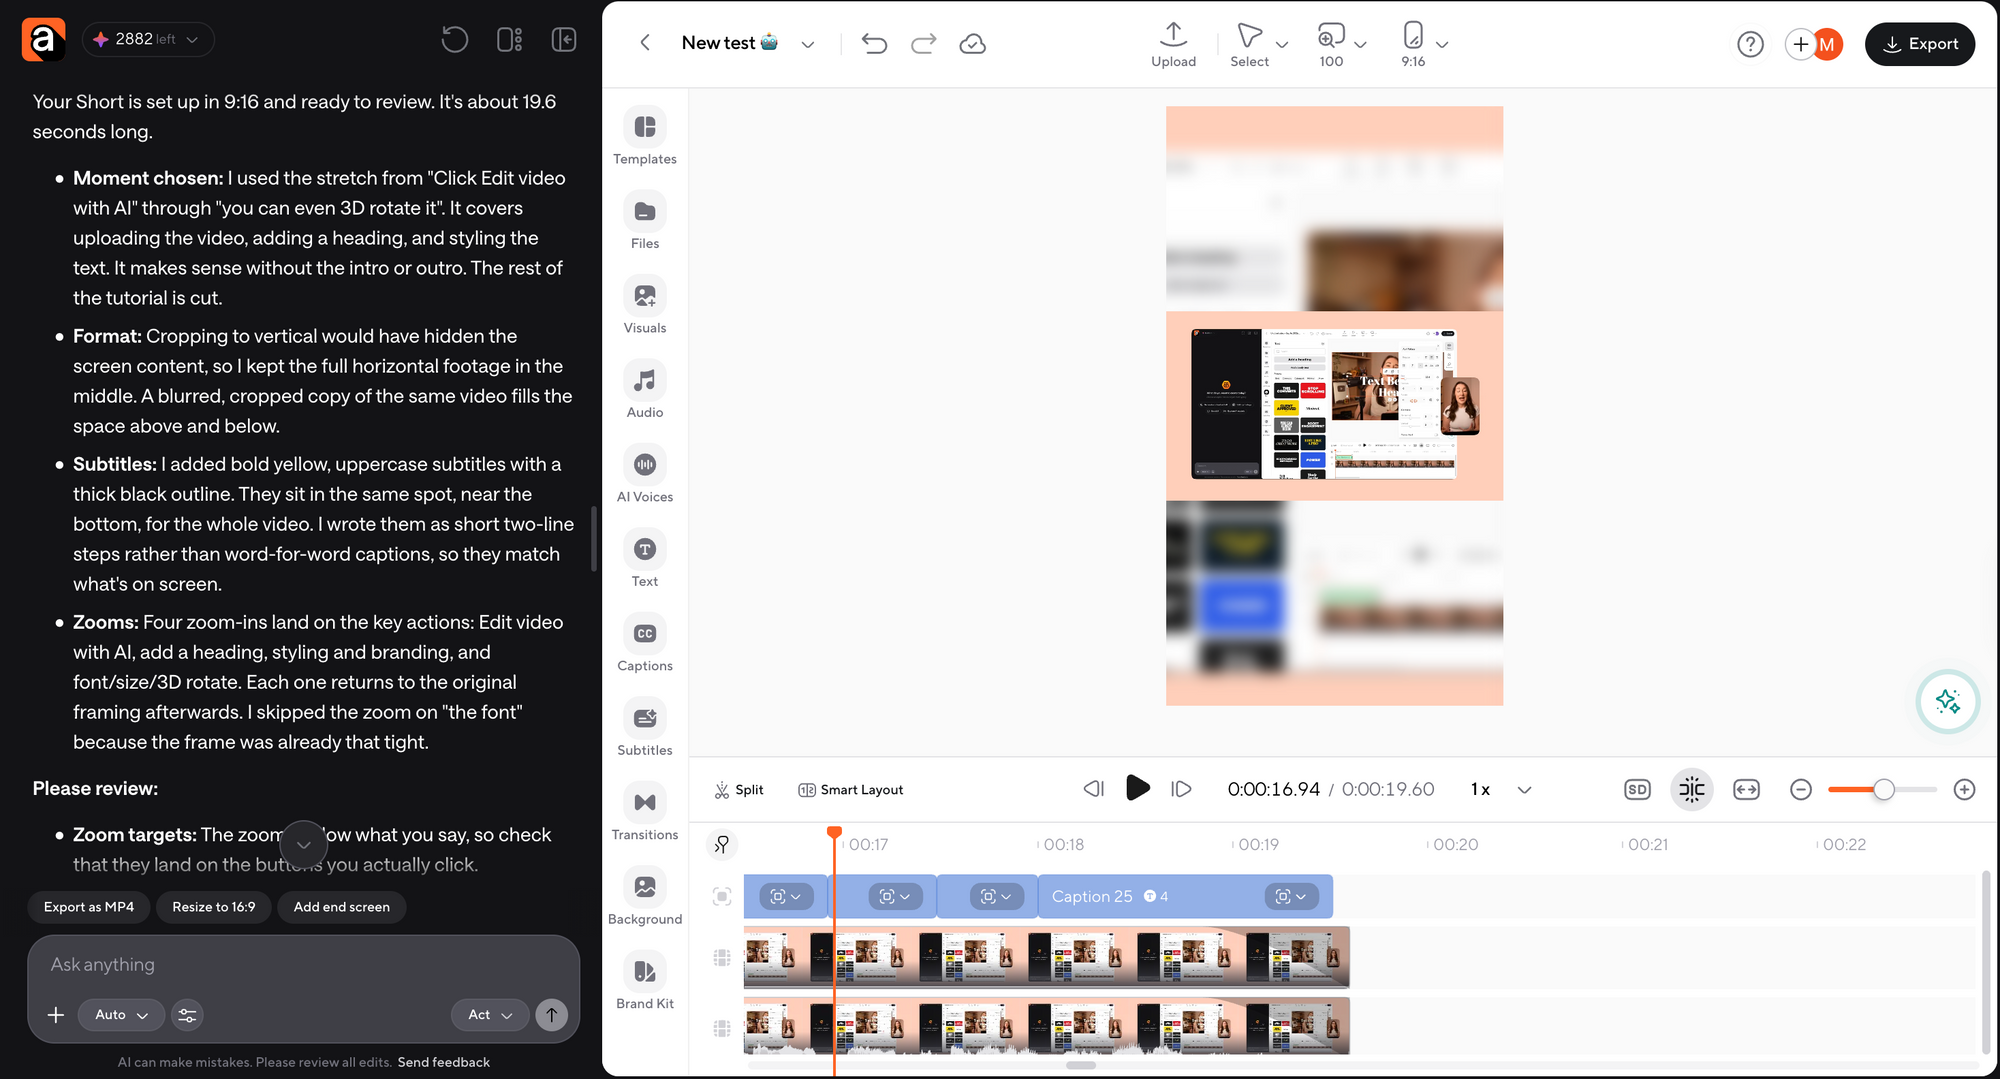
For example, in my case, its response was:
'I've built the 20-second Short, but I haven't checked the preview or the zoom placement yet. It replaces your two earlier highlights.
- Moment: It's the trim-and-cut section, source 4:57–5:18. It runs from "Option two, to cut out a mistake…" through "Place the playhead… click split… delete" to "…feel tighter and more professional." It stands on its own, and it runs for about 21 seconds.
- Format: It's 9:16. The screen recording stays horizontal so nothing gets cropped. A blurred, dimmed copy of the same video fills the space above and below it.
- Subtitles: They're bold yellow with a thick black outline. They sit in the same spot for the whole clip, below the video band, at most 3 words at a time.
- Zooms: There are two push-ins, one at about 6s for the split step and one at about 12s for the delete step. Each returns to the original framing afterward.
Things for you to review:
- Zoom targets: The zooms push in on the center of the frame. I can't see where the buttons are on screen, so please check that they land on the right part of the screen. If a button sits off-center, I'll need to adjust the zoom.
- Sharpness: The zoom is about 1.55x, which may soften the footage slightly.
- Length: The clip is 21s, slightly over 20s, because I kept the last sentence whole."
In the end, I’m pretty happy with how it turned out, so I don’t feel the need to make any manual adjustments.
But we've only tested the Skill on one video so far, so let's try it on another recording.
Step 5: Reuse your saved AI editing Skill on a new video
Now that we’ve created our first Short, I want to see whether our Skill can do the same thing with a completely different video.
Quick recap: our first clip was 21 seconds long, had bold yellow subtitles with a black outline, and included two zoom-ins to highlight the split and delete steps. Async also kept the footage horizontal within the 9:16 frame and added a blurred background.
So, for our second test, let’s upload another tutorial into a new Async project.
Once the video is uploaded, go to the Skills menu and select My Tutorial Shorts Style again.
This time, I’m going to keep my prompt very short:
“Turn this new tutorial into a YouTube Short using my saved Tutorial Shorts Style Skill. Choose the most useful moment and follow all my saved editing instructions.”
And that’s it! I’ve deliberately left out the subtitle styling, zoom-ins, and video length because those instructions are already saved in our Skill.
Now, when Async finishes editing, here’s what I want to check: Is our new clip still around 20 seconds? Does it use the same yellow subtitles? And, most importantly, are the zoom-ins actually highlighting the buttons being demonstrated?
I’m paying particular attention to that last part because, in our first test, Async warned me that the zooms were centered and might need adjusting.
The goal here is to see how much of our original editing style carries over to a new recording without having to explain everything again.
The result was pretty good! The new video looked consistent with the first one, and Async followed the editing style I'd saved.
But this time, I felt like the video needed a little more action, especially when demonstrating certain features.
So, I went back to the chat and asked:
"Can you make the zoom-ins more dramatic? I want you to zoom into the actual video, focus on a specific element being demonstrated, and then zoom back out to the original framing."
Async added the stronger zoom-ins, and I liked the result much better. Although, after watching it again, I noticed the second zoom lasted a little too long.
So I asked it to end that zoom a bit earlier.
One last thing I noticed was that the video ended rather abruptly, so I asked Async to make the ending a little smoother.
And voilà! Here's my final result:
Now, I think this is a good example of why it's worth testing your AI editing Skills on several videos.
The exact same instructions might work perfectly for one recording, but once you try them on another, you might realize there's something you'd like to change.
For me, it was the zoom-ins. I liked my original editing style, but I preferred the more dramatic, targeted zooms in the second video.
So I'd recommend testing your Skill on a few different recordings before deciding you've found your perfect editing style.
And now that I know what works for me, I'd update my saved Skill to include those stronger zoom-ins and a smoother ending. That way, my next tutorial can start with the improved version of my editing style.
Can you use AI editing Skills to create a video thumbnail?
Before finishing the experiment, there’s one more Skill I want to try. We’ve already worked on the video itself. Now, let’s use the image-generation Skill to create a thumbnail for our tutorial clip.
This is available in the Skills menu, and its purpose is to help Async generate images with guidance around the prompt and output settings. I’ll use the tutorial topic as the starting point.
Prompt to test: “Create a YouTube thumbnail for this tutorial, please.”
Here's what Async came up with
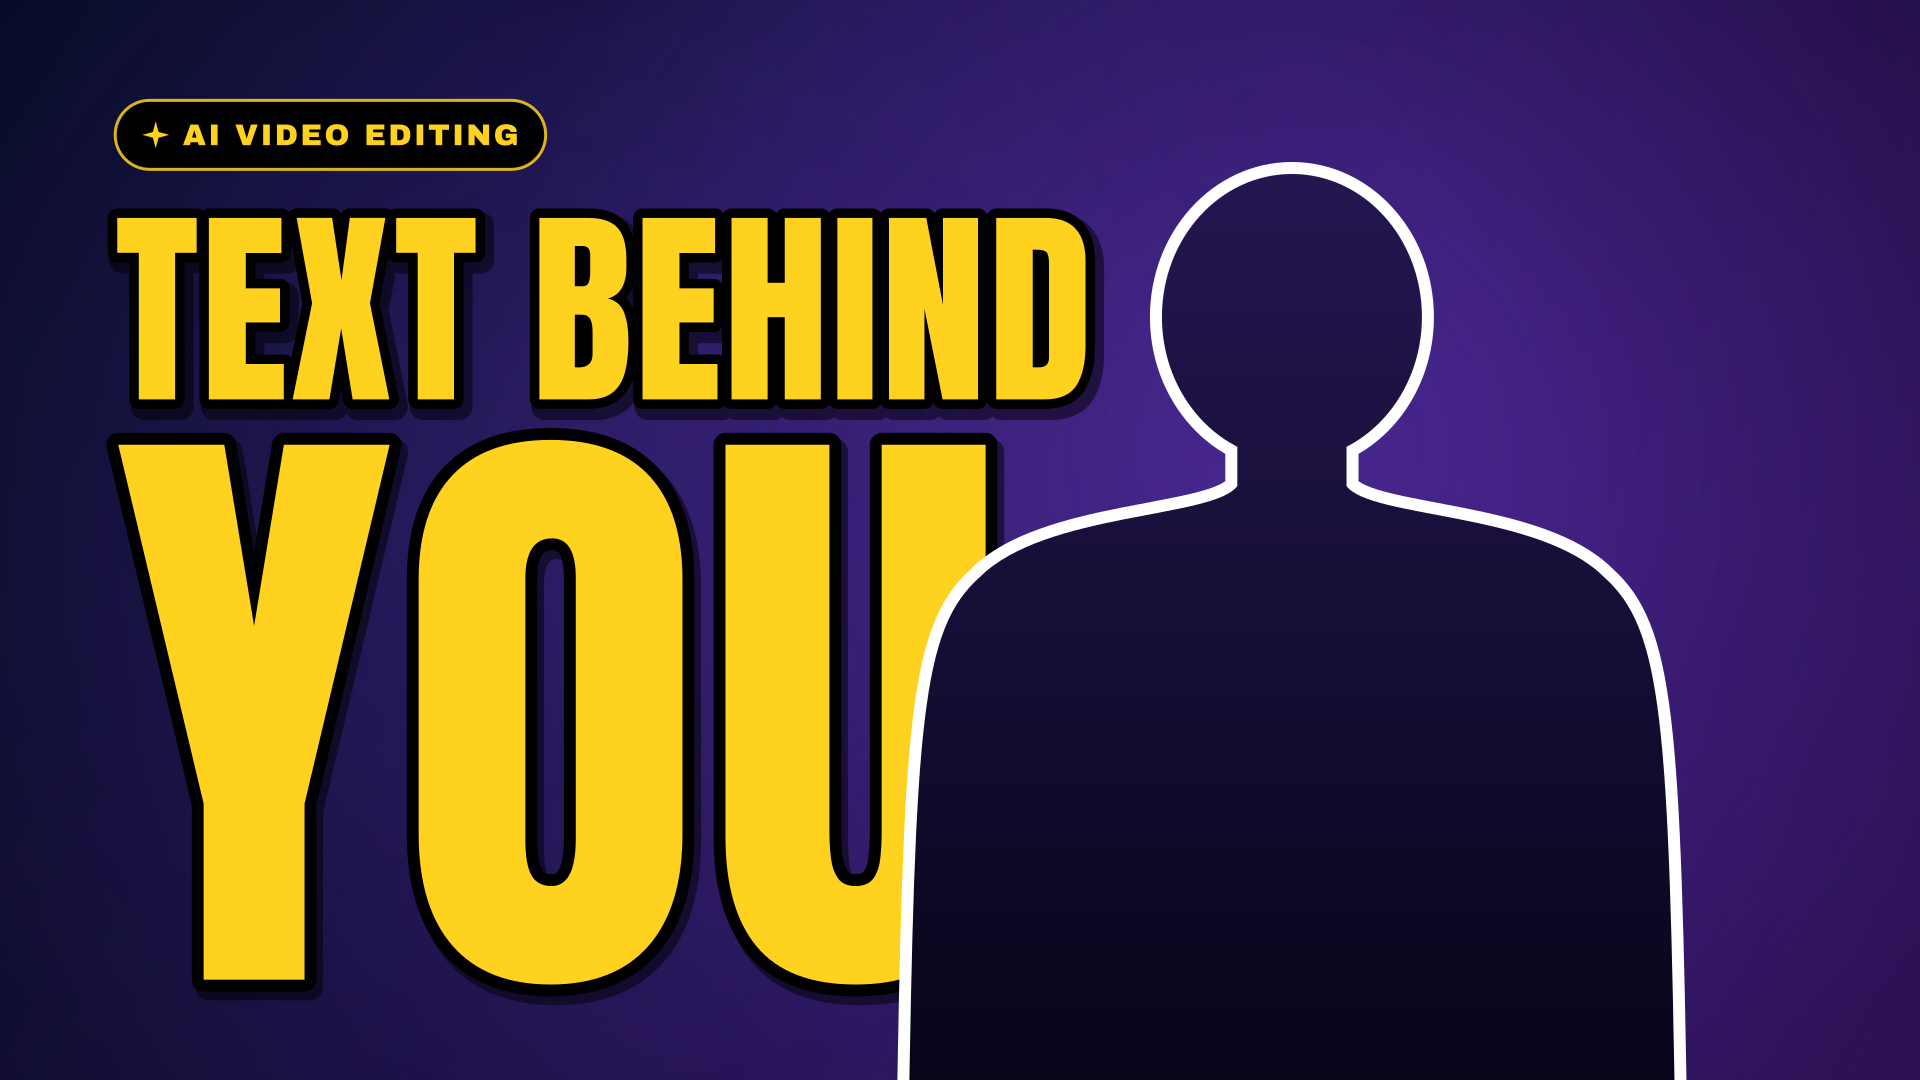
As you can see, it's pretty simple, but if you're creating videos every day and don't want to spend three or four hours designing each thumbnail, this does the job!
And if you want something more specific to your channel, you can always create a separate image-generation Skill, give it reference images and examples of what you like, and keep refining it until you have a thumbnail style that feels just right for your content.
P.S. A little tip for you guys! If Async is working on a longer task and your laptop starts slowing down, you can close the tab and get on with other things. The AI will keep working in the background, and you'll get an email notification when your video is ready. Then you can come back, check the result, and export your finished video!
AI editing Skills vs video editing presets: What’s the difference?
You might already be familiar with video editing presets, especially if you’ve worked with software like Premiere Pro.
Presets are usually saved settings for specific effects or editing elements. For example, you might have a color preset that gives your footage a warmer look or a text preset that applies the same font and animation.
AI editing Skills work a little differently.
A Skill can contain broader instructions about how a task should be performed.
So, while a preset might tell your editor how your subtitles should look, a custom Skill could also describe how you want the video paced, which moments should be kept, and what kinds of edits you want to avoid.
For someone working on several similar videos, I think the combination could be useful.
My verdict: Are AI editing Skills worth it?
For me, absolutely! Especially if you're someone who creates similar videos regularly and already has a specific editing style in mind.
In this experiment, I started with one long YouTube tutorial, used AI to find its highlights, and then created my own Skill to turn those highlights into 20-second Shorts with my preferred subtitles, zoom-ins, and video format. And the first result was pretty much exactly what I wanted!
The second test needed a little more work, but that's actually what I liked about the whole process. My saved editing style carried over to a completely different video, and when I wanted stronger zoom-ins and a smoother ending, I could simply ask Async to make those changes through chat.
So, my verdict is that creating a reusable AI video editing workflow with Skills is definitely worth trying, especially for YouTubers, small businesses, or anyone producing content regularly.
One thing I'd recommend, though, is to test your Skill on a few different recordings before settling on your final instructions. What looks perfect in one video might need a few adjustments in another.
Personally, I'm keeping my Tutorial Shorts Skill. And now that I know exactly how I like my videos edited, I think my next tutorial will be a whole lot easier!
FAQ
How do I create an AI video editing workflow?
You can create an AI video editing workflow by defining the editing tasks and preferences you want to reuse. In Async, open AI Chat, access the Skills menu using the + button or slash command, and select Add a new skill. Provide instructions describing the workflow, required inputs, desired output, and editing preferences.
Can I save my video editing style with AI?
Yes. Async supports custom Skills that can contain preferred editing instructions, such as pacing, formatting, and other workflow preferences. These instructions can be saved for use in future editing tasks. The accuracy of individual edits still depends on the footage and the capabilities available in the editor.
Are AI editing Skills the same as video editing presets?
No. Traditional video editing presets generally store settings for a particular effect, transition, or visual element. AI editing Skills can contain broader instructions describing how an AI editor should approach a task. Both can help maintain consistency, but they serve different purposes.
Can AI automate an entire video editing workflow?
AI can automate several video editing tasks, including selecting highlights, trimming footage, adding subtitles, and generating assets. However, some projects still require manual review or correction, particularly when framing, timing, or visual details are important.
Can I reuse an Async Skill on multiple videos?
Async Skills are designed to store reusable instructions for recurring tasks. You can select a saved Skill when working on another video. Reviewing each result is recommended because different recordings may require different editing decisions.