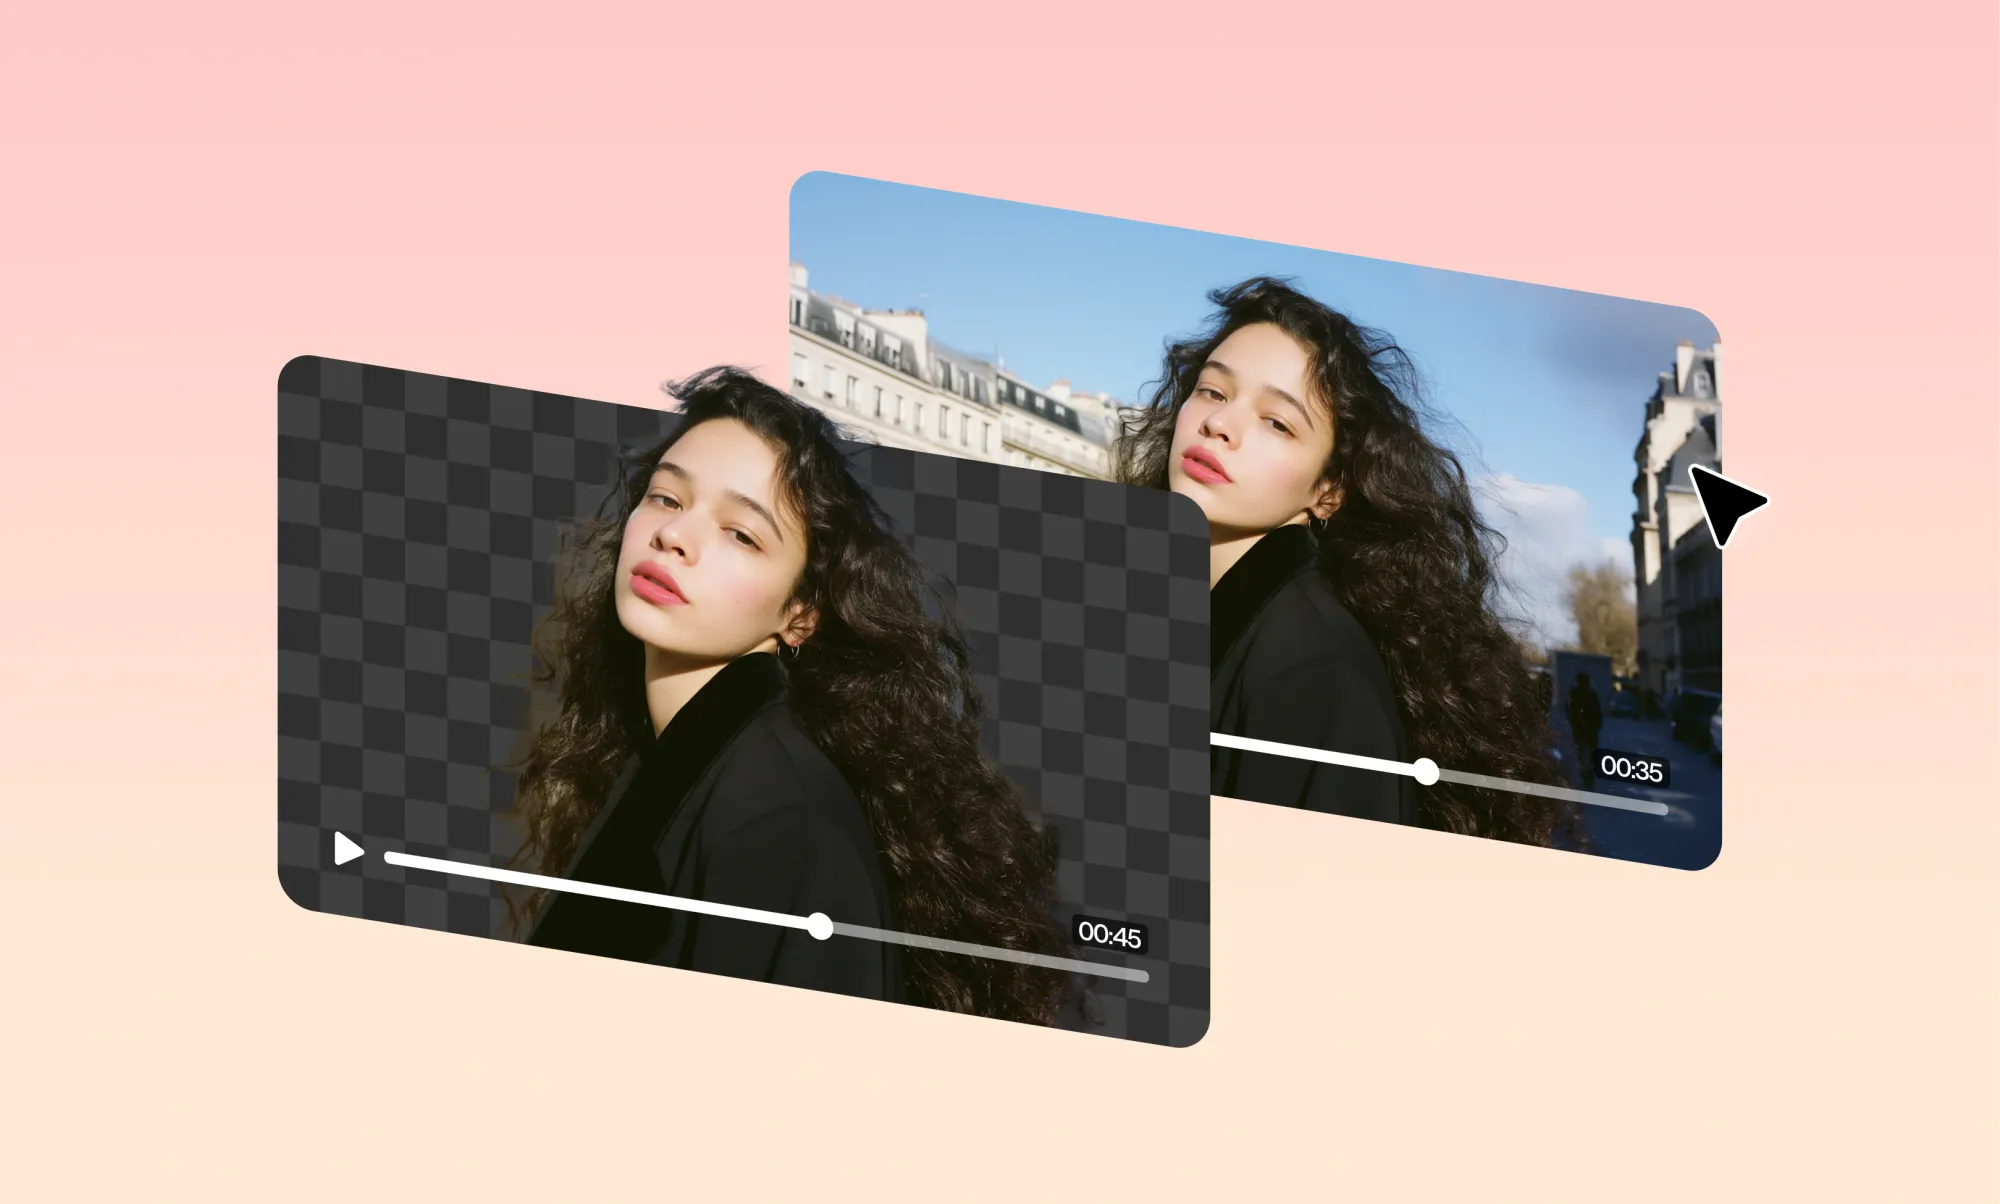
Nobody wants to see your laundry pile. Or the roommate's dishes, or the hotel curtains, or whatever is stacked in the corner behind your very serious talking-head video.
Good news: you can remove background from video without hanging a single square foot of green fabric. Upload the clip to an AI editor, let it detect the person in the frame, strip everything behind them, and drop in a color, an image, or another video. It takes about a minute on a normal talking-head shot. Below is the exact workflow, tested end-to-end, plus the footage where it goes wrong and what to do about it.
How to remove background from video with AI
Every AI video background remover works in the same four steps, whichever one you pick.
- Upload your video. Shorter clips process faster,r and free tiers usually cap length or resolution.
- Let the AI identify the main subject. Modern tools do this automatically, no masking or keying required. This is called subject segmentation: the model decides which pixels are "person" and which are "everything else."
- Remove the original background. In most editors, this is applied as an effect on the clip rather than a permanent change, so you can turn it off again.
- Add what goes behind the subject. A solid color, a gradient, a still image, another video, or transparency if your export format supports it.
That is the whole job. The interesting part is not the removal, it is what you put behind the subject and whether the edges hold up. Both are covered below. We've also covered how to remove a person or object from your video in a separate article, so make sure you check that too!
How to remove a video background in Async
Here is the real thing, run on a real clip. The footage: a woman sitting on a sofa in a bright living room, twenty-five seconds, laptop, and lamp and curtains in shot. A typical home talking-head setup with a background that adds nothing.

Before: an ordinary living-room background with plenty of distractions.
Step 1: Get the clip into a project. Open Async's AI video editor, start a video project, then click Upload for your own footage or Visuals for a stock clip.
Step 2:Select the clip. Click it once on the timeline. "Working with the selected item" appears above the chat box, confirming the next instruction applies to that clip.
Step 3:Ask for it in plain words. The prompt used here: "Remove the background from this clip and keep only the woman." You can also just say "remove the background." Naming the subject helps when several people are in the frame. If you want to edit videos with AI prompts as a general habit, this is the same pattern.
Step 4: Let it process. Async fetched the skill, loaded its editing tools, applied the change, and reported back: the background is stripped, only the subject remains, and the effect is processing. An "Applying effects" indicator shows Background Removal running against the clip. The whole job cost one credit.
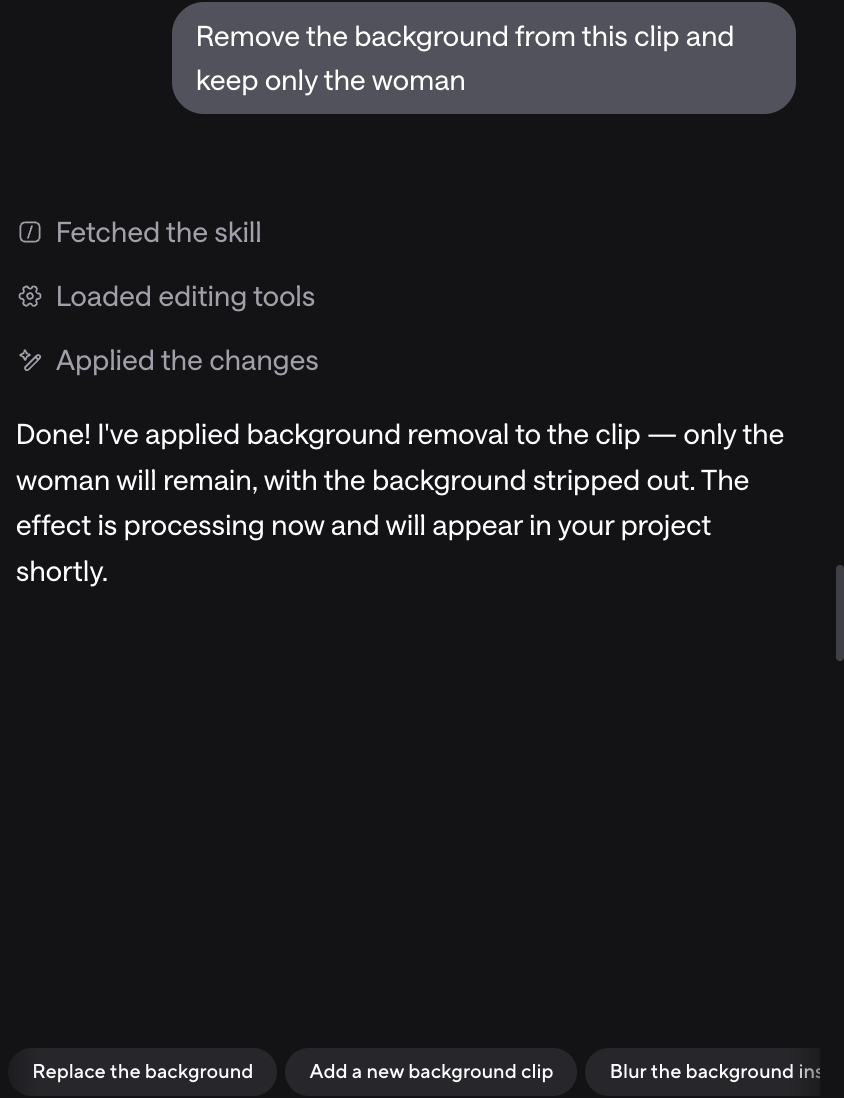
Async confirms the effect and offers the obvious next moves.
The result is a clean cutout. The subject sits on the project background, which is what now shows through behind her.

After removal: subject isolated, room gone.
Step 5:Put something behind her. The chat suggests replacing the background, adding a new background clip, or blurring the background instead. Choosing replacement, Async asked two quick questions rather than guessing: solid color or gradient, and which color, with named options including navy blue and deep purple plus a custom field.
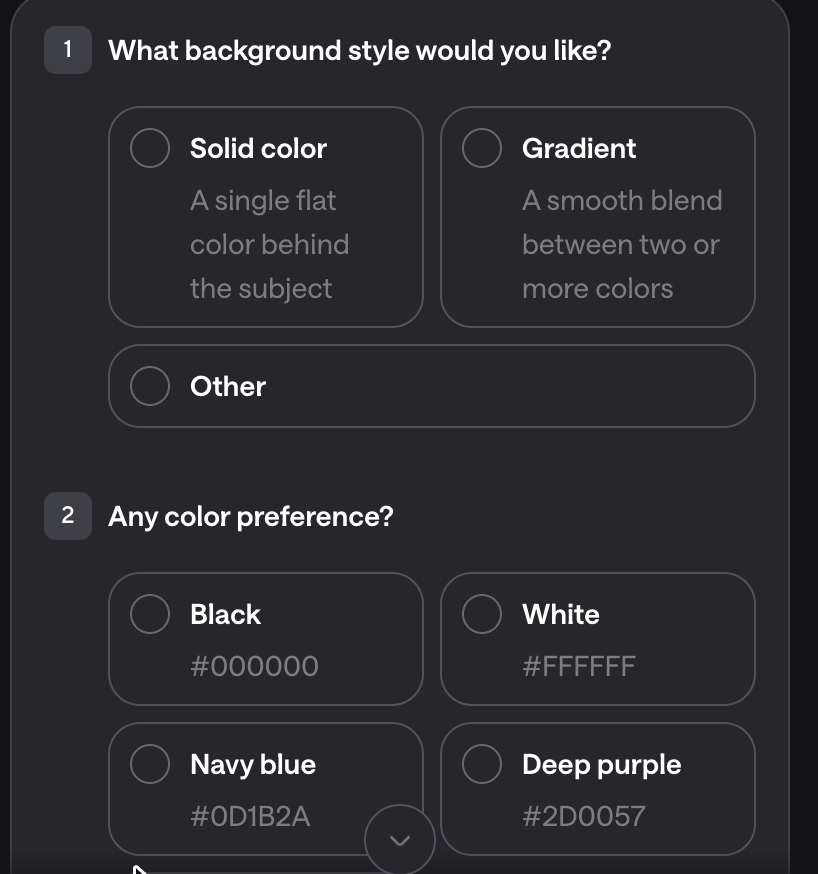
Async asks before it commits, which saves a round of undo.
Picking a solid navy set the project background to #0D1B2A, and it shows through behind the subject immediately.

After replacement: same subject, deliberate background.
You can also do this manually. The Background tab in the left rail has Basic and Stocks views with solid colors, gradients, stock imagery, and an upload slot, so you can set what shows through without going via chat. For a full video background, add an image or clip on a layer below the subject instead.
One honest note from the test: where the sofa arm overlapped her body, a small dark sliver of couch survived the cutout. On a navy background, it reads as a shadow. On a bright white background, it would be obvious. That is normal, and it is the reason the sections below exist.
Do you need a green screen to remove a video background?
Usually no. There are two different technologies here.
Chroma key is the old way. You film against a uniform green or blue wall, then the software deletes that exact color range. It is fast, cheap to compute, and extremely precise because the computer is not guessing what a person is. It just deletes green.
AI subject segmentation is the new way. A model trained on millions of images decides, frame by frame, which pixels belong to the subject. No special wall, no special lighting, no gear. It works on footage you already shot.
For social video, talking heads, product explainers, and internal comms, segmentation is good enough and enormously more convenient. A green screen still wins when you need precision: flyaway hair against a busy background, fast motion with heavy blur, translucent objects like glasses or a glass of water, semi-transparent fabric, or long-form professional work where a single bad frame gets noticed. If you are shooting something that has to be perfect and you have the space, green fabric and even lighting are still the reliable answer.
What can you replace a video background with?
Removal is the boring half. This is where the video actually gets better.
- Solid color. The safest option. Reads as intentional, keeps attention on your face, and hides edge artifacts better than any busy image.
- Brand color or gradient. A gradient in your brand palette makes a talking head look like it came from a content team rather than a bedroom.
- A studio or office image. Believable, but only if the lighting direction and camera height roughly match your footage. A subject lit from the left in front of a scene lit from the right looks wrong even when the cutout is flawless.
- Another video. Slow-moving footage works best. Anything with fast motion competes with you for attention.
- A blurred version of the original background. The least risky upgrade of all, because the scene stays real and the edges do not have to be perfect.
- A screen recording or screenshot. Put yourself in the corner over your own demo. This single move powers most product explainers on social.
- Transparent. Useful when the clip is a layer inside a bigger edit, though it depends on your export format supporting alpha.
If the background is fine and only one thing in it bothers you, do not remove the whole scene. That is a different job: see how to remove a person or object from video while keeping everything else intact.
How to remove background from video for TikTok, Reels, and Shorts
Short-form is where this gets used most, and the reasons are practical rather than artistic.
Cleaning up a talking-head clip filmed in a messy room. Putting yourself over a screenshot, chart, or screen recording for commentary and reaction formats. Product explainers where the product needs the frame, not your kitchen. POV and meme formats that place you inside a scene. Series consistency, so twenty videos filmed in different rooms all share one background and look like one channel.
Two things matter more in vertical format. Your subject fills more of the frame, so edge quality is more visible. And viewers watch on small screens, which forgive soft edges but punish anything flickering. Preview at full speed with sound off before you post.
How to remove background from video on your phone
Most major mobile editors now do automated subject isolation, and for a short clip filmed in decent light, the result is fine. The workflow is the same everywhere: import, tap the AI or cutout tool, pick a replacement, export.
The catch is compression. Phones squeeze the export hard, and compression makes soft cutout edges look worse than they did in the app. If the video matters, do the removal on desktop or in a browser editor and use the phone for quick fixes. Working on a laptop is easier anyway once you are stacking layers: our guide to editing videos on Mac covers that setup.
How to remove background from video online for free
Plenty of tools offer a free tier, and for one short clip, that is often all you need. Read the limits before you invest time in an edit, because free usually means at least one of these:
- A clip length cap, commonly between ten and sixty seconds
- Export capped at 720p, sometimes 480p
- A watermark on the output
- A monthly quota of exports or processing minutes
- A queue, so a job that takes one minute on a paid plan takes fifteen minutes
Async runs on a credit system, and the twenty-five-second removal in this test cost a single credit. What your account includes depends on your current plan, so check pricing rather than taking a number from an article.
Why does AI video background removal sometimes look bad?
Because the model is making a judgment call on every frame, and some frames are genuinely ambiguous.
Hair and fine detail. Individual strands are thinner than the model's confidence. Loose or curly hair against a busy background is the single most common failure.
Motion blur. A moving hand is semi-transparent across its edge. The model has to decide where the hand stops, and the answer changes every frame, which is what causes flicker.
Subject and background share a color. A grey hoodie against a grey wall gives the model almost nothing to separate. Same for skin tones against warm wood.
Objects in front of the subject. A mug lifted into frame, a microphone, a laptop lid. Anything that crosses your silhouette confuses the boundary, which is exactly how the sofa arm survived in the test above.
Shadows. Your shadow on the wall behind you is background, but it is shaped like you. Models often keep part of it.
Fast movement. Turning quickly, gesturing broadly, standing up. Each frame changes shape faster than the tracking settles.
Translucent materials. Glasses, glassware, sheer fabric, steam. There is no correct answer for a pixel that is partly you and partly the room.
Low-quality footage. Compressed, low-light, or heavily re-uploaded video gives the model mush to work with. Nothing downstream fixes that.
How to get a cleaner background removal
- Start with the highest-quality footage you have. Original files, not re-exports of re-exports.
- Separate yourself from the background when you film. Three feet of space kills the color-similarity problem before it starts.
- Light evenly, and light yourself more than the wall. Even soft light on your face and a background that is not the same brightness give the model a clear edge to find.
- Avoid extreme motion. Sit or stand relatively still through the shot. Save the big gestures for footage that keeps its background.
- Check hair, hands, and frame edges specifically. Step through the frames where a hand enters or leaves. That is where failures hide.
- Choose a replacement background with believable lighting and perspective. A dark subject on a bright beach looks pasted on. Match the light direction, and when in doubt, use a solid color.
- Consider blur instead. If a preview shows edge trouble, blurring the real background often produces a better video than a perfect-looking cutout on a fake scene. More habits like this are in our guide on how to edit videos.
Background removal vs. blur vs. replacing the background
FAQ
How do I remove the background from a video?
Upload the clip to an AI video editor, let it detect the subject, apply background removal, then set a color, image, or video to show through behind them.
Can AI remove a video background?
Yes. AI subject segmentation identifies the person in each frame and strips everything else, with no green screen and no manual masking.
Can I remove a video background without a green screen?
Yes, and for social and talking-head video, it is now the normal way to work. A green screen only wins on precision jobs such as fine hair detail or heavy motion.
How do I remove a video background for free?
Most tools have a free tier. Expect limits on clip length, resolution, watermarking, or monthly exports, so check before you build an edit around one.
How do I remove a video background online?
Browser-based editors do it without any installation. Upload, ask for background removal, pick a replacement, export.
Can I remove a background from a video on an iPhone?
Yes, mobile editors handle simple clips well. Heavy export compression makes edge artifacts more visible, so use desktop for anything important.
How do I change the background of a TikTok or Reel?
Remove the background, then place a solid color, image, screen recording, or slow-moving clip behind your subject. Vertical framing shows edges more clearly, so preview at full speed first.
Why does video background removal look blurry around hair?
Because individual strands are finer than the model can confidently classify. Better lighting, more separation from the background, and higher-quality footage all help, and a solid background hides what remains.
Can I make a video background transparent?
Yes, when your export format supports an alpha channel. Otherwise, export the subject over a color and layer it inside your main project instead.