You can trim clips, add music, export a file, and still watch the final video thinking, “Why does this feel off?”
Good editing usually comes down to a few things: choosing the right moments, cutting with intention, shaping the pacing, cleaning up the sound, adding helpful visuals, correcting the color, and exporting the video properly.
So, how do you edit videos well? Start by organizing your footage, picking your strongest takes, building a rough cut, tightening the timeline, improving the audio, adding B-roll where it supports the message, fixing the color, and exporting in the right format. Once the base edit works, techniques like J-cuts, L-cuts, match cuts, subtitles, reframing, and AI video tools can help you refine the final result.
This guide covers the video editing basics, but it’s not only for absolute beginners. If you’re new to editing, you’ll get clear steps to follow. If you already know your way around a timeline, you’ll find practical ways to make your edits cleaner, tighter, and easier to watch.
We’ll also look at how editing changes across talking-head videos, tutorials, product content, podcasts, social media clips, and AI-assisted editing, so you can apply the same principles to different types of projects.
Some video editing basics
Video editing is the process of selecting, arranging, improving, and exporting clips so they become one clear video. The basics include cutting footage, organizing scenes, fixing sound, adjusting color, adding text or graphics, and choosing the right export settings. Better editing goes further: it makes every choice serve the viewer.
What does video editing actually mean?
Video editing is not only about trimming clips. It is the process of turning separate pieces of footage, sound, text, graphics, and effects into one coherent video that feels intentional from beginning to end.
Some see editing as selecting recorded images, placing them together into an organized and coherent discourse, then adding sound, still images, effects, graphics, and corrections where needed. That is a useful definition because it reminds us that editing is not just “cutting clips.” It is building the final meaning of the video.
That’s why two people can use the same footage and create completely different videos.
One editor might turn an interview into a slow, emotional story. Another might turn the same interview into a punchy social clip. The footage did not change. The choices did.
At its simplest, editing answers a few questions:
This is why learning video editing basics is less about memorizing every button and more about understanding what each choice does to the final video.
What are the main parts of a good edit?
A good edit usually has seven layers: structure, pacing, visual flow, sound, color, text, and export. You do not need advanced effects to make a video feel better. You need each layer to do its job without fighting the others.
Here’s the simple breakdown:
The easiest mistake is to focus only on the visible parts: transitions, fonts, effects, overlays, animations. Those things can help, but they rarely fix a weak edit.
- If the structure is confusing, a transition will not save it.
- If the audio is harsh, a color grade will not save it.
- If the pacing is slow, a trendy caption style will not save it.
A better way to edit is to build in layers: structure first, then pacing, sound, visuals, color, and final details. That order keeps you from polishing clips that may not belong in the final cut.
What should you fix while recording, not editing?
Editing can improve footage, but it cannot fully rescue everything. If the footage was recorded with distorted audio, harsh light, missing detail shots, or shaky framing, the edit becomes harder before it even starts.
Modern editing tools can reduce problems like overexposed images or saturated audio, but it is still better to avoid those issues while recording.
This is especially important for creators filming their own content. You do not need a cinema setup, but you do need footage that gives you options.
Before recording, try to get these right:
Beginners often shoot too wide or record long continuous takes, which makes editing harder. A better approach is to record shorter takes with a variety of shots, including close-ups and detail shots.
That is a great editing lesson, not just a filming lesson.
- If you only film one wide shot, your edit has nowhere to go.
- If you record a tutorial without close-ups, the viewer may miss the important step.
- If you film a product without detail shots, you lose the texture, scale, and those “I want that” moments.
Good footage gives the edit breathing room.
What is the difference between a basic edit and a better edit?
A basic edit makes the video watchable. A better edit makes the video easier to follow, more enjoyable to watch, and more intentional. The difference is usually not one dramatic trick. It is a series of small decisions that remove friction for the viewer.
A basic edit might:
- Cut out mistakes
- Add music
- Put the clips in order
- Add a title
- Export the file
A better edit asks:
- Is this the strongest opening?
- Can this sentence be shorter?
- Does this cut feel natural?
- Is the music fighting the voice?
- Would B-roll make this clearer?
- Does the color look consistent?
- Is the final format right for the platform?
An AI video editor can speed up tasks like adding subtitles, clipping, reframing, cleaning up, and repurposing. Still, the final edit depends on the choices behind the cut: what stays, what goes, and what the viewer needs to understand.
So if there is one idea to keep before moving into the full process, it is this:
Good video editing is not about using every trick. It is about making the video clearer, smoother to watch, and harder to abandon.
Your complete video editing guide
To edit a video well, work in passes: organize your material, choose the strongest clips, build a rough cut, tighten the pacing, improve the audio and visuals, then export for the platform where the video will be published.
Trying to cut, polish, color, caption, and choose music at the same time can make the edit harder to manage. A cleaner approach is to move through each stage in order.
Start with organization and select
Before you start cutting, organize your footage and choose the strongest moments. This makes the edit faster because you are no longer digging through random camera files while trying to make creative decisions.
At a minimum, create folders for:
You do not need a complicated folder system. You just need one that keeps you from naming everything final_final_v7_USE_THIS.mp4.
After that, create a specific timeline. This is a separate timeline where you collect only the best clips, lines, reactions, product shots, or screen moments before building the full edit.
For example:
This step matters because editing feels much lighter when you are choosing from strong options, not trying to rescue every second you filmed.
Build the rough cut before you polish
A rough cut is the first complete version of your video. Its job is to prove that the structure works before you add music, effects, color, captions, or transitions.
At this stage, keep it plain. Focus on the order of ideas, the main message, and whether the video makes sense from beginning to end.
Ask:
This is where you should be ruthless. A clip can be beautiful and still slow the video down. A line can be funny and still distract from the point. A shot can be expensive and still belong in the trash folder emotionally, if not literally.
The rough cut should answer one question:
Would this video still work without the fancy stuff?
If the answer is yes, you have something worth polishing.
Tighten the pacing with smarter cuts
Once the rough cut works, tighten the timeline. Remove dead air, repeated lines, weak transitions, slow setup, and anything that makes the viewer wait without a reason.
But do not confuse tight pacing with cutting every pause.
A tiny pause can make a joke funnier. A breath before an important point can create tension. A quiet moment in a product video can make the shot feel more premium.
Cut the parts that slow the viewer down, not the parts that help the moment land.
Useful cuts include:
This is where videos start to feel more intentional. Instead of cutting only because “this part is too long,” you cut because the viewer’s attention, eye movement, or understanding needs help.
For example, if someone opens a box, do not wait until the action is fully finished before cutting. Cut while the movement is happening. The viewer’s eye follows the action, so the edit feels smoother.
If you are editing an interview, do not make every answer start and stop visually at the same time as the audio. Let the next person’s voice come in a little before the visual cut, or let the current voice continue over B-roll. That tiny overlap can make the whole video feel less choppy.
The goal is simple:
Make the cut feel motivated, not random.
Improve audio, color, and visual support
After the structure and pacing work, move into audio, B-roll, captions, graphics, and color. These details should support the edit, not distract from it.
Start with audio.
Viewers may forgive imperfect lighting, but harsh or messy sound makes a video feel amateurish very quickly. Audio editing may involve balancing different volumes, reducing noise, adding sound effects, or working on sound separately when the video editor itself is too limited.
Focus on:
Then add visual support.
B-roll, captions, text, and graphics should make the video easier to follow. They should not feel like decorations thrown on because the timeline looked empty.
Use B-roll when the viewer would benefit from seeing what you mean. Use captions when speech needs support. Use labels when a tutorial step needs clarity. Use graphics when an idea is easier to understand visually.
Then correct the color.
Color correction comes before color grading. Correction means fixing exposure, contrast, white balance, saturation, and consistency so the footage looks natural. Grading is where you add a style or mood after the footage is already balanced.
Here are some basic image corrections that improve many videos: adjusting contrast, increasing or decreasing light, reducing saturation slightly for a cleaner look, and balancing color when one tone dominates.
Export for the platform, not just the timeline
Exporting turns your timeline into the final video file. The goal is to keep the quality high, the file playable, and the settings matched to where the video will be uploaded.
This is where technical basics matter.
A video file is not just “an MP4.” Video files involve containers and codecs: the container holds the video, audio, and text data, while codecs encode, decode, compress, and decompress that information. Codec issues can be one reason a video fails to open, upload, or play correctly.
For most online videos, MP4 with H.264 is a safe starting point. Remember that MP4 is commonly used for platforms like Facebook, Instagram, YouTube, and Twitter/X, and that H.264 is widely used for web uploads because it keeps quality high while keeping bitrate manageable.
Before exporting, check:
And do one final watch before uploading. Look for misspelled captions, weird cuts, music that is too loud, black bars, cropped faces, wrong logos, or an export name that will embarrass you later.
A strong edit can still be weakened by the wrong export. Treat exporting as part of the editing process, not just the final step after the edit is complete.
How to edit videos for different projects
The same editing basics apply to most videos, but each project has a different priority. A tutorial needs clarity. A product video needs detail. A podcast clip needs a strong idea. A social video needs fast context. The better you understand the job of the video, the easier your editing decisions become.
Talking-head videos need rhythm and personality
Talking-head videos work best when the speaker feels clear, natural, and easy to watch. Your job is to remove distractions without cutting out the person’s rhythm.
Focus on:
Use jump cuts, subtle punch-ins, captions, and B-roll when they help the point. If someone mentions a messy timeline, show the timeline. If they mention a product, show the product. If the point is emotional or opinion-based, keep the speaker on screen so the viewer can connect with the person.
A good talking-head edit should feel tighter, not robotic.
Tutorials need clarity before style
Tutorials are not the place to show off every transition you know. The viewer is trying to learn something, so the edit needs to make each step easy to follow.
Focus on:
Cut out loading screens, repeated clicks, and unnecessary searching. But slow down when the viewer needs to understand a button, setting, tool, ingredient, or movement.
For screen recordings, zoom in when something is too small to see. For hands-on tutorials, use close-ups and detail shots.
A good tutorial edit should feel clean, not rushed.
Product videos need detail and desire
Product videos need to make the viewer understand the product and want to keep looking at it. The edit should show texture, scale, movement, use, and the small details that make the product feel real.
Focus on:
This is where match cuts, sound design, and color accuracy matter. If someone twists a cap, add a soft cap sound. If fabric moves, use subtle foley. If food is poured, sliced, or spread, let the viewer almost feel the texture.
But keep the product honest. A dramatic color grade might look cool, but if it changes the true color of a lipstick, shoe, food item, or package, the edit is hurting the product.
A good product edit should make the item feel desirable without making it feel fake.
Podcast clips need the idea first
Podcast clips and interviews work best when the edit finds the strongest idea quickly. The viewer needs to understand the hook, context, and payoff without needing the full conversation.
Focus on:
The biggest mistake is starting too early. In conversations, people often warm up before saying the useful part. For a short clip, the strongest sentence may need to come first.
Look for moments with a clear opinion, lesson, story, tension, or surprise. Then cut around that idea.
A good podcast clip is not just a shorter conversation. It is one complete idea, edited so it can stand alone.
Social media videos need fast context
Social media videos need to make sense quickly. The viewer is usually scrolling, distracted, and deciding within seconds if the video is worth their attention.
Focus on:
Start closer to the point. Instead of “Today I want to talk about three editing mistakes,” try something sharper like, “Your video probably feels amateur because of the audio, not the camera.”
For Reels, TikToks, and Shorts, use vertical framing, readable captions, quick examples, and small visual changes that keep attention moving. But do not mistake speed for quality. A fast video can still feel boring if the idea is weak.
A good social edit should make the point easy to catch before the viewer scrolls away.
AI-assisted videos need human taste
AI-assisted videos still need editing. Whether you are generating clips, animating images, repurposing long videos, or using AI to create captions and cutdowns, the final result still needs structure, pacing, sound, and consistency.
AI can help you create or speed up parts of the video, but it can also produce awkward motion, inconsistent visuals, strange pacing, or clips that look impressive but do not say much.
Focus on:
This is especially useful if you want to create visuals you did not film yourself, repurpose content for multiple platforms, or learn how to animate an image with AI as part of a bigger edit.
A good AI-assisted edit should not feel like a folder of outputs stitched together. It should feel selected, shaped, and directed.
Where AI fits into modern video editing
AI can help with the parts of video editing that usually take the most time: captions, transcripts, silence removal, audio cleanup, reframing, clip selection, background removal, and even generating extra visuals. But AI works best as part of the edit, not as a replacement for your creative judgment.
That matters because learning how to edit videos for beginners used to mean learning every manual step first. Now, AI can help with the first draft, while creators spend more time deciding what to keep, what to cut, where the story starts, and what the viewer needs to understand next.
Use AI for repetitive editing tasks
AI is most useful when it removes repetitive work. If you have a long podcast, webinar, tutorial, or talking-head recording, AI can help you move through the first messy layer much faster.
For example, AI can help with:
This is especially useful for creators who publish across multiple platforms. One long video can become a YouTube upload, a few Shorts, several Reels, a captioned LinkedIn post, and a teaser for email or landing pages.
That is where AI can save real time. Not by magically making a perfect video, but by helping you create more usable versions without rebuilding everything manually.
If you are comparing tools, a guide to the best AI video editor can help you understand which platforms focus on editing, clipping, captions, generation, or repurposing.
Keep human control over story, taste, and context
AI can suggest clips, generate captions, clean audio, and reframe footage, but it can miss context. A human review is still needed to check the opening, structure, tone, pacing, framing, and final selection.
Keep control over:
For example, AI might pick a podcast quote because the speaker sounds excited. But maybe the quote needs two missing sentences to make sense. Or it might crop a vertical video around the wrong person because they moved more, even though the other person is speaking.
Use AI-generated visuals as raw material
AI-generated video can be useful for abstract visuals, concept shots, background scenes, animated images, or extra B-roll you did not film. Treat those clips as raw material, then select only the moments that fit the video’s structure and style.
The common mistake is treating AI output as the final video.
That is how you get a sequence of impressive-looking clips that feel disconnected. The visuals may be strong, but the edit has no rhythm, story, or clear reason to keep watching.
Use AI-generated visuals the same way you would use filmed footage:
- Pick only the strongest clips.
- Remove awkward motion or strange frames.
- Arrange the visuals around a clear idea.
- Add music, sound design, captions, or voiceover.
- Match the color and style as much as possible.
- Cut anything that looks cool but does not help the video.
What video editing software should you use?
The best video editing software depends on what you are making, how much control you want, and how comfortable you are with a timeline. If you are learning how to edit a video, start with a tool that matches your current project. Short-form clips, podcasts, product videos, and AI-generated visuals do not all need the same setup.
Here’s a simple way to choose:
If you want the simplest path, choose the editor based on the job in front of you.
For quick social videos, CapCut is often enough. It is built around short-form editing, templates, captions, trending styles, and fast exports. For podcasts or interviews, Descript can feel easier because you can edit the video almost like a document. Delete a sentence from the transcript, and the matching part of the video is removed too.
For more advanced work, DaVinci Resolve gives you deeper control, especially if color matters. It is also a good place to learn more traditional editing habits, like using J/K/L keys to move through footage, I and O to mark in and out points, and separate pages for editing, color, audio, and export. Premiere Pro is another strong advanced option, especially for teams and professional post-production, but it usually comes with a steeper learning curve.
Async fits well if you want something that feels more modern and less manual. Instead of building every version of a video from scratch, you can use AI-assisted tools to help with captions, clipping, reframing, cleanup, and repurposing. That makes it useful for creators who want professional-looking results without spending all day inside a heavy editing timeline.
Runway sits in a slightly different category. It is less about traditional editing and more about generating or extending visuals. If you are exploring AI-generated scenes, concept shots, abstract B-roll, or creative experiments, it can be useful alongside your main editor. If you want to compare more tools in that category, this guide to the best AI video generators is a helpful next read.
The main point: do not choose the most advanced tool just because it sounds professional. Choose the tool that helps you finish the video well. For video editing for beginners, that usually means starting with something simple enough to use consistently, then moving into more advanced software as your projects need more control.
How to use Async for faster video edits
Async is useful when you want one place to upload footage, generate captions, adjust the format, and prepare different versions of the same video. It works especially well for creators making talking-head videos, podcast clips, tutorials, social videos, and AI-assisted content that needs clean structure and fast variations.
Step 1: Upload your footage
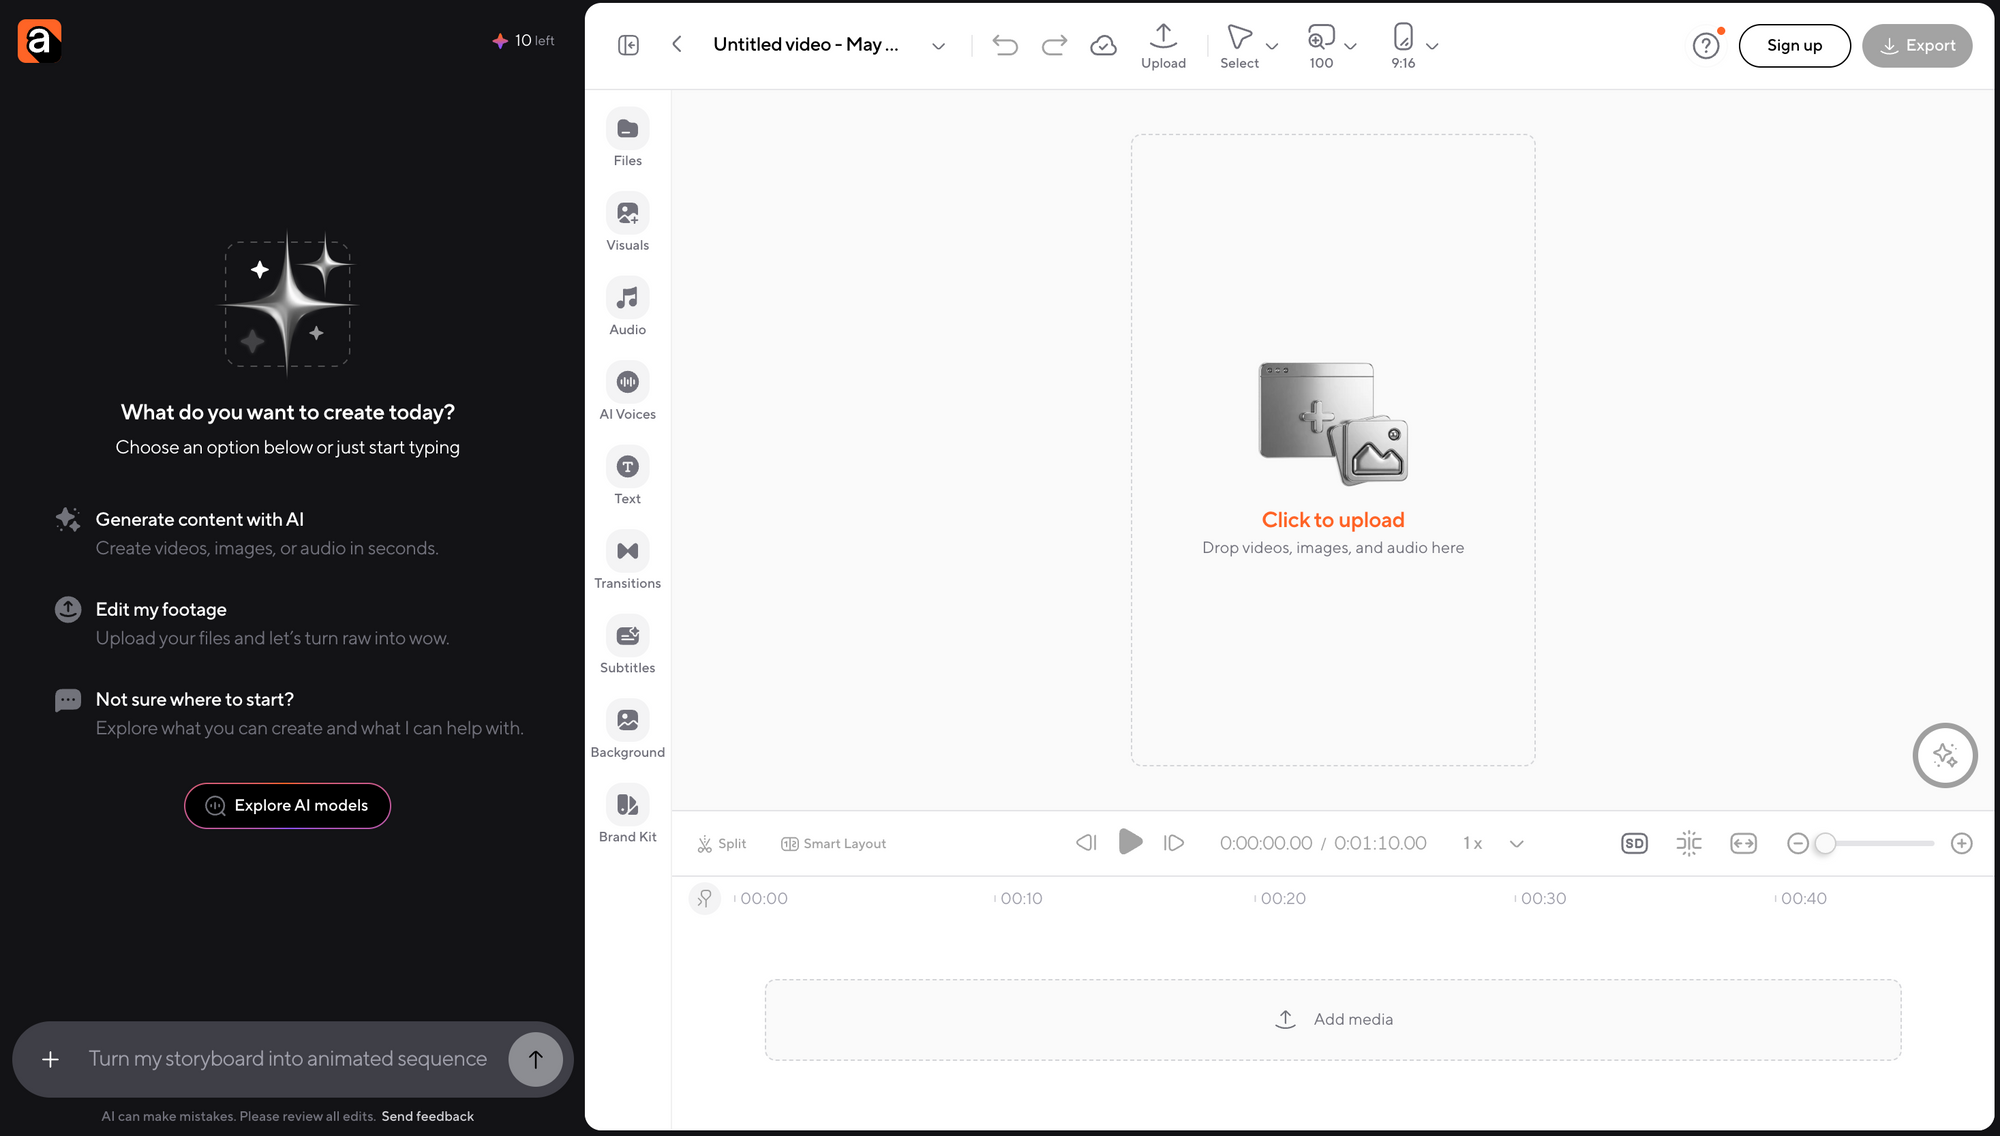
Start by uploading your raw video into Async. This could be a long podcast recording, a talking-head video, a product clip, a tutorial, or a piece of content you want to turn into shorter social edits.
At this stage, your goal is simple: get the footage into one place so you can start shaping it.
Step 2: Generate captions and clean up the edit
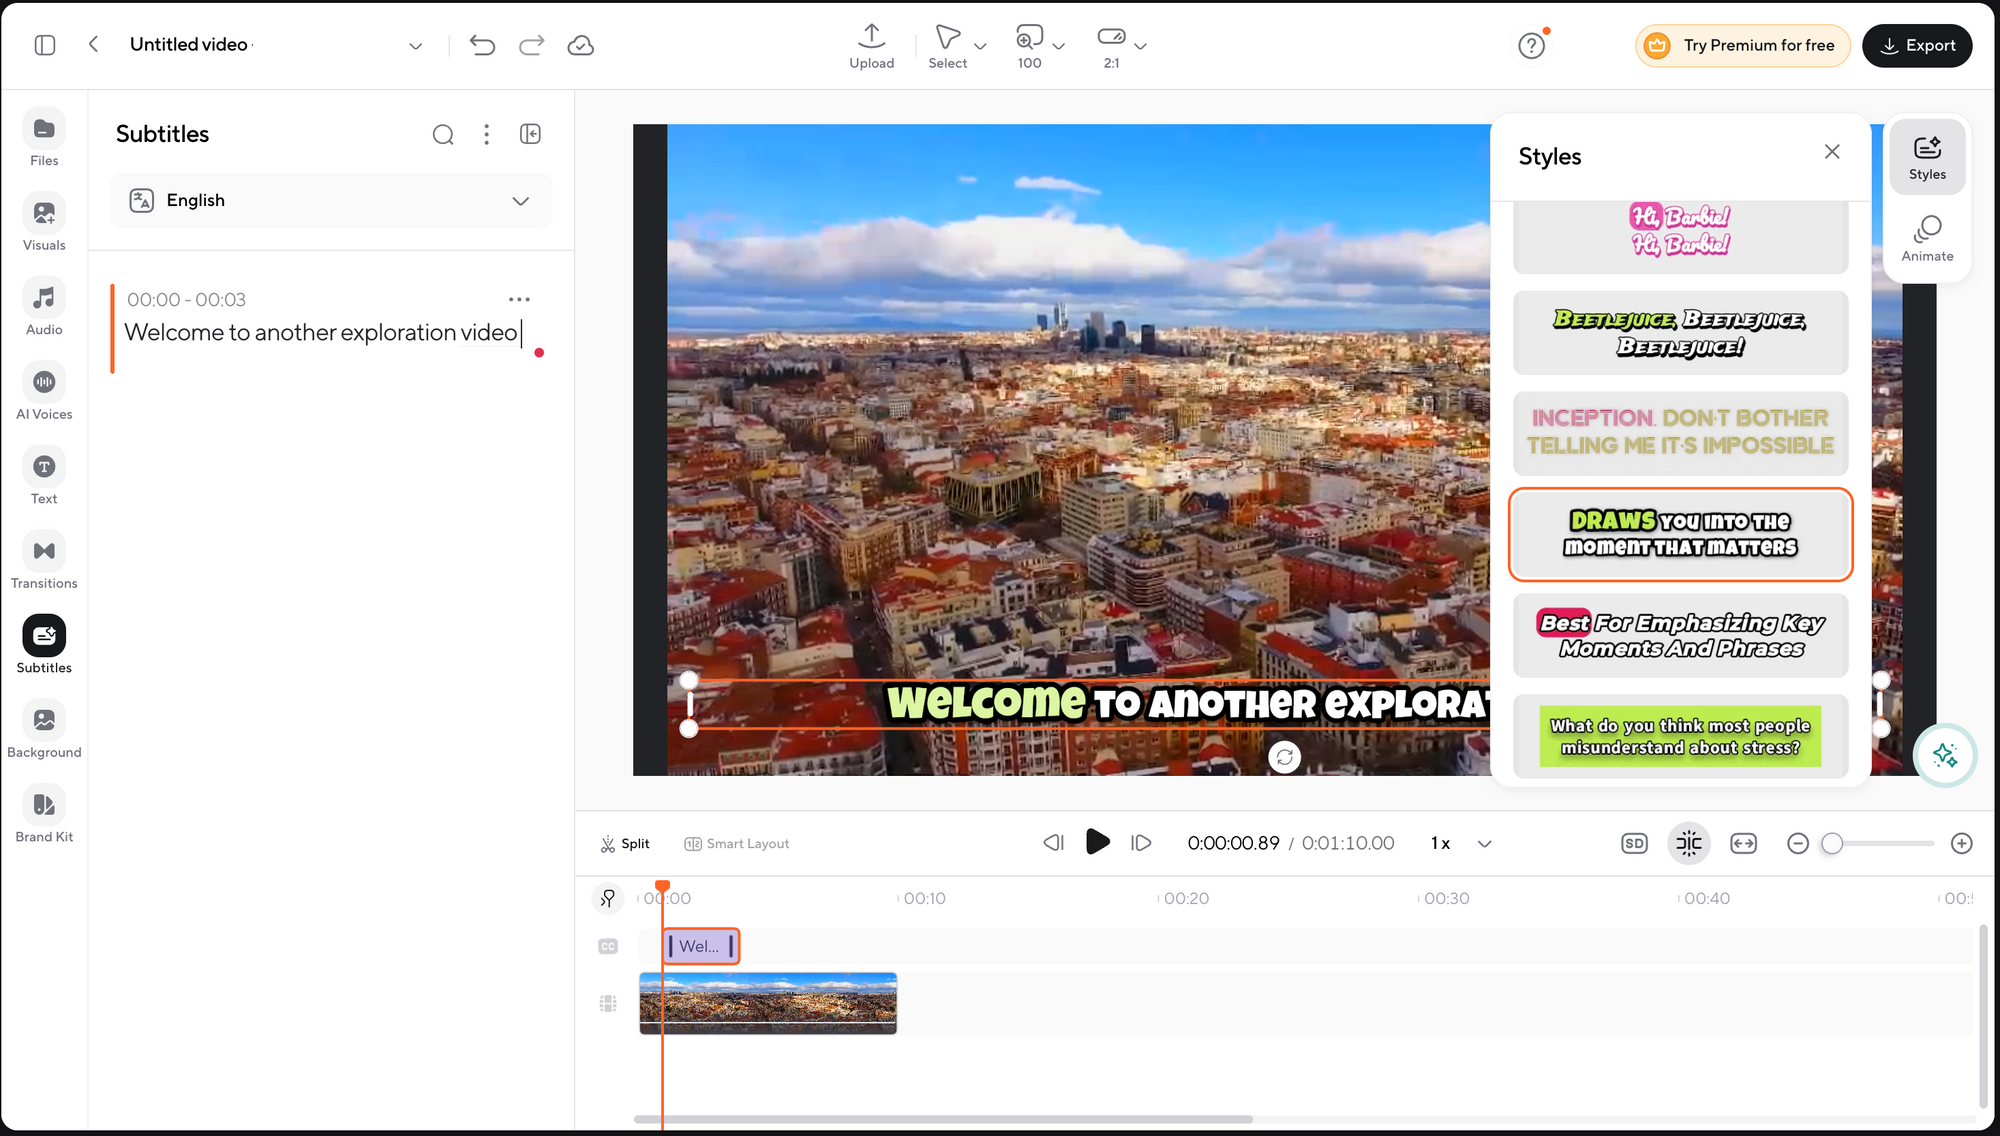
Once the video is uploaded, use Async to generate captions and review the transcript. This is helpful for educational videos, social clips, tutorials, and interviews where viewers need to follow the message clearly.
Captions should still be checked manually. AI can save a lot of time, but names, brand terms, technical words, and casual speech can still need cleanup.
Step 3: Reframe or repurpose the video
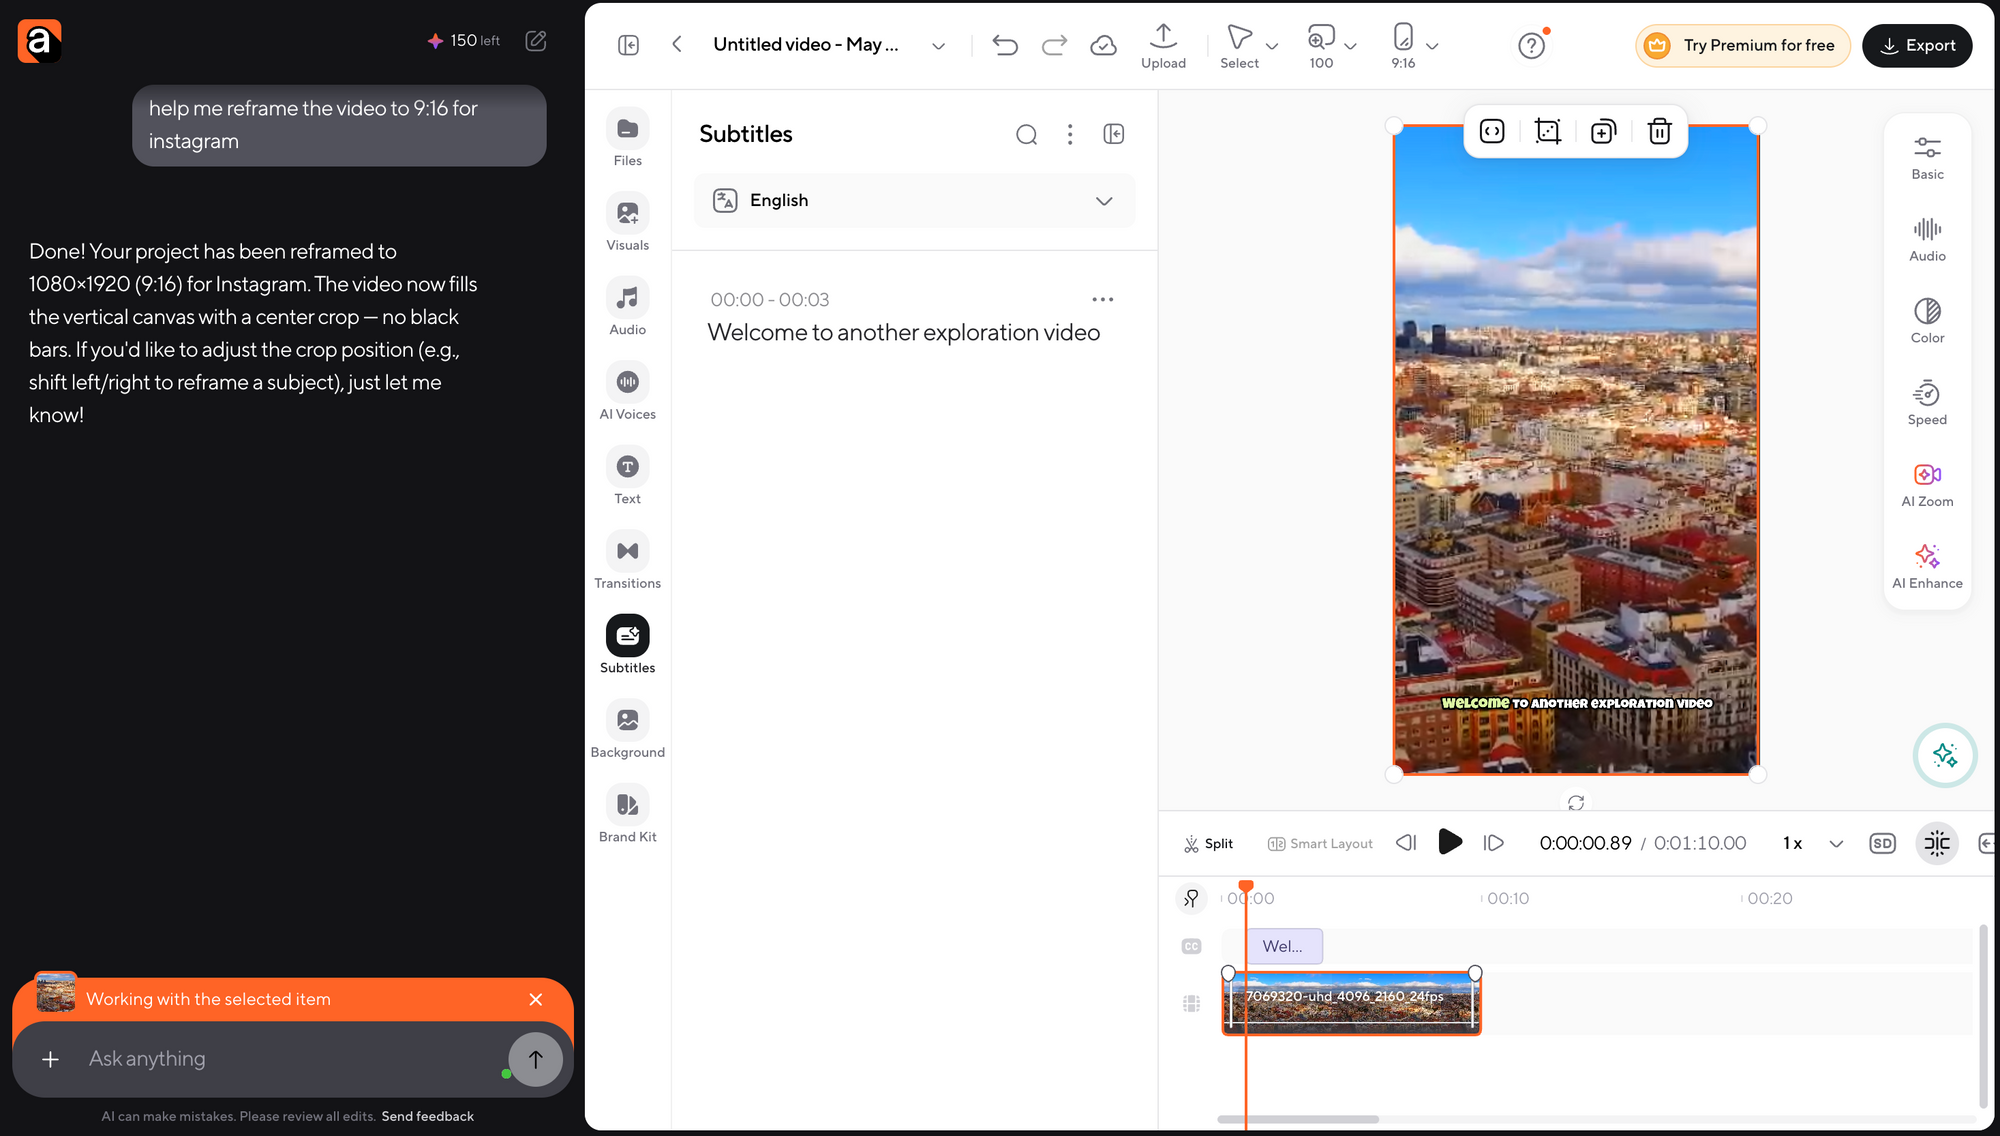
After the main edit works, create the version you need for each platform. A horizontal YouTube video may need a vertical cut for Reels, TikTok, or Shorts. A long interview may need several short clips. A tutorial may need captions, step labels, or tighter pacing.
This is where Async can be useful if you publish across multiple channels. You can keep the same core idea, then adapt the format without rebuilding the whole edit from scratch.
Step 4: Review and export the final version
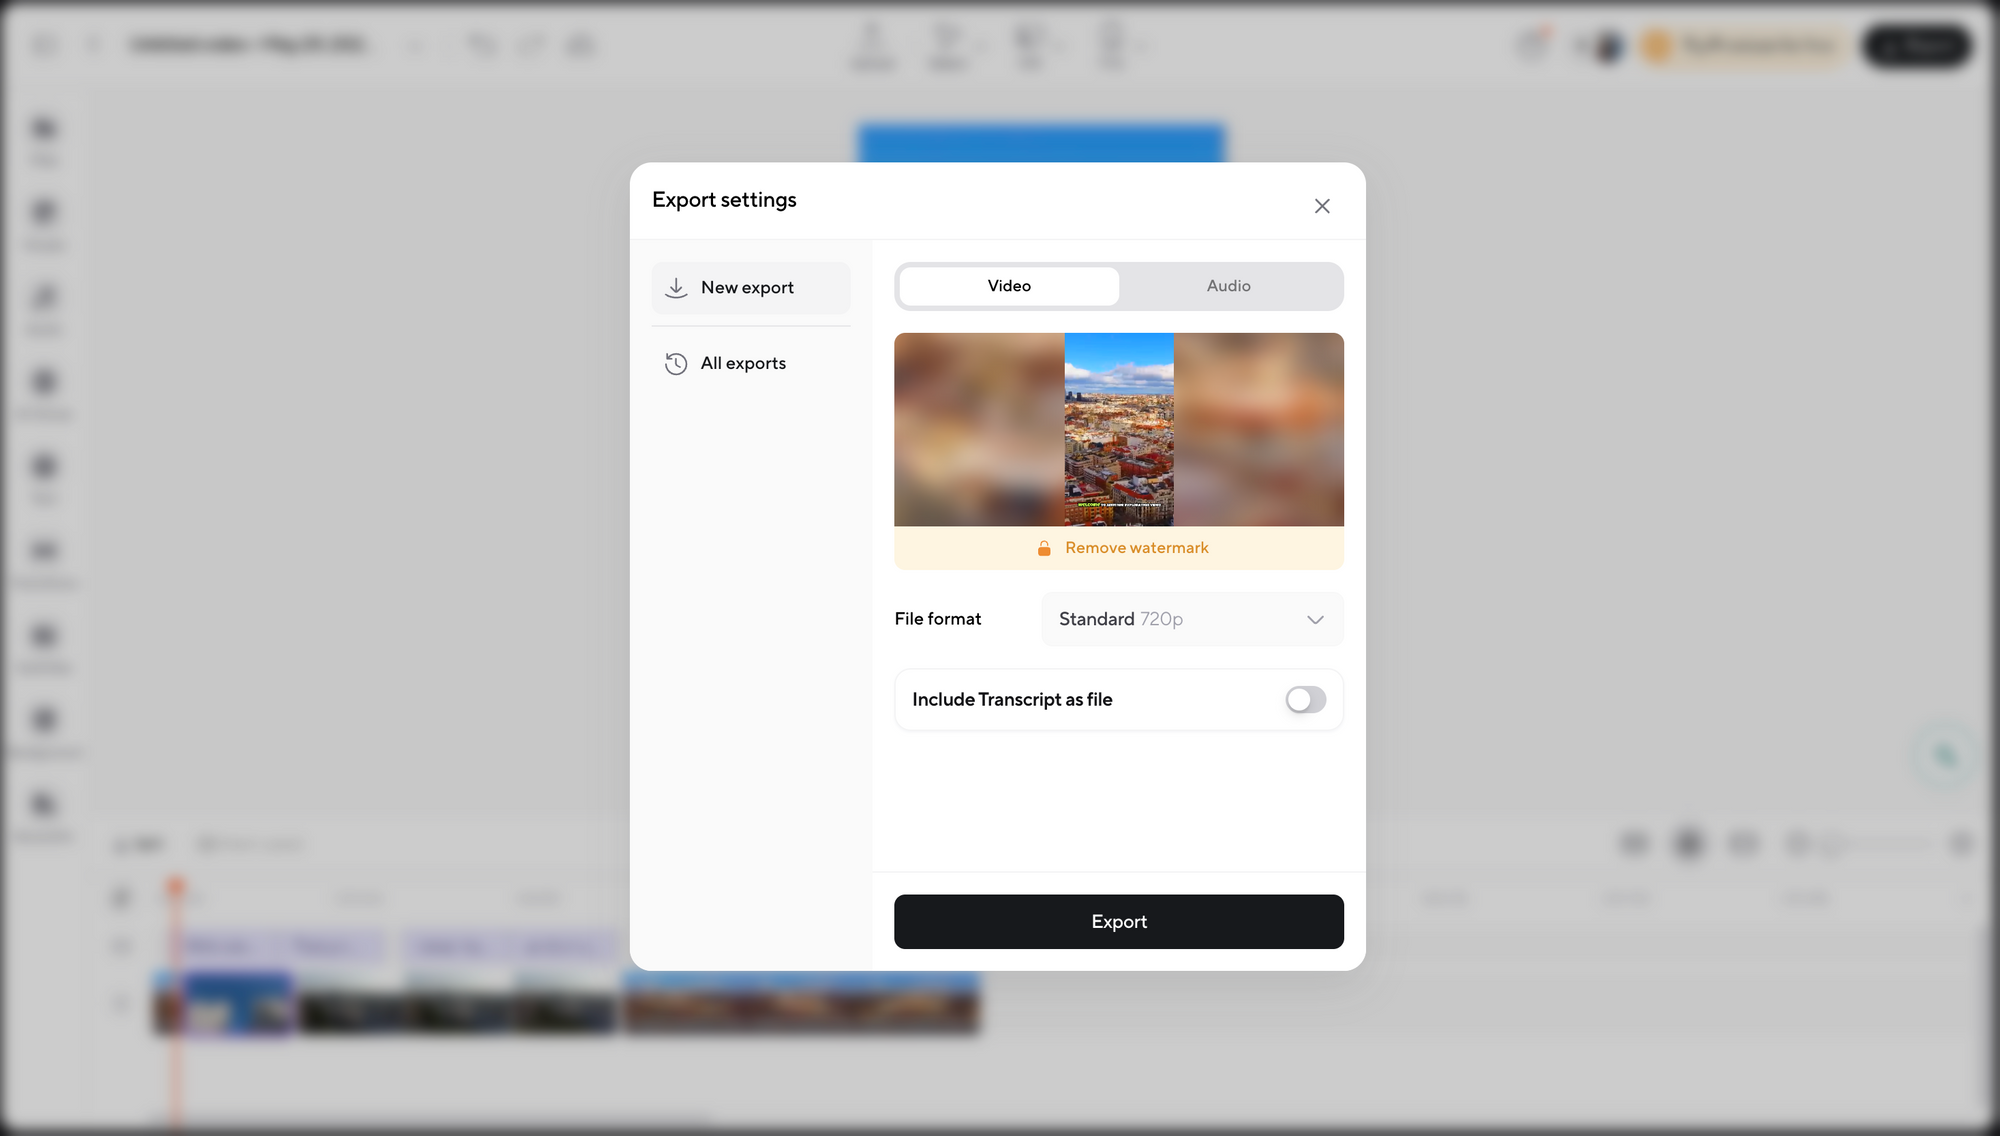
Before exporting, watch the video from start to finish. Check the pacing, captions, audio, framing, cropped faces, product shots, and any missing context.
Once the video feels clear, polished, and correctly formatted, export the final version.
Before you publish, do one final editing pass
Before you publish, watch the full video once like a viewer. Check the opening, pacing, audio, visuals, color, captions, and export format.
This final pass is where small mistakes usually show up: a caption typo, a music track that is slightly too loud, a product shot that cuts too soon, a face cropped awkwardly in the vertical version, or a title that made sense at midnight but now feels dramatic for no reason.
Use this quick check before exporting:
The best edits usually feel simple on the surface because every cut, caption, sound, and visual choice has a purpose. Once the video feels clear, polished, and easy to watch, it is ready to publish.
Frequently asked questions about how to edit videos
What is video editing?
Video editing is the process of selecting, arranging, trimming, improving, and exporting video clips so they become one finished video. It includes structure, pacing, sound, color, text, graphics, effects, and final export settings. Good editing makes the video clearer, more watchable, and more intentional.
Is video editing hard to learn?
Video editing is not hard to start learning, but it takes practice to get good at it. The basic tools are simple: cut, trim, arrange, add sound, add text, and export. The harder part is learning timing, pacing, story, and what to remove.
How long does it take to learn video editing?
You can learn basic video editing in a few days or weeks, especially if you are editing simple social videos or talking-head content. Getting confident with pacing, audio, color, B-roll, and platform-specific exports usually takes a few months of consistent practice.
What are the basic steps of video editing?
The basic steps of video editing are: organize your footage, choose the best clips, build a rough cut, tighten the pacing, clean the audio, add B-roll or text, correct the color, review the full video, and export it in the right format for the platform.
What is the easiest way to edit videos?
The easiest way to edit videos is to start with a simple structure: cut out mistakes, remove slow parts, arrange the clips clearly, add captions or B-roll only where helpful, then export for the platform. AI tools can also speed up captions, clipping, cleanup, and reframing.
What is the best video editor for beginners?
The best video editor for beginners depends on the project. Async works well for AI-assisted editing, captions, clipping, and repurposing. CapCut is strong for short-form social videos. Descript is useful for talking-head videos and podcasts. iMovie and Clipchamp are simple starting points for basic edits.
Can I edit videos for free?
Yes, you can edit videos for free. CapCut, iMovie, Clipchamp, DaVinci Resolve, and several browser-based tools offer free options. Free plans may include limits like watermarks, lower export quality, fewer AI features, or storage restrictions, so check the details before starting a bigger project.
How do I edit videos on my phone?
To edit videos on your phone, use a mobile-friendly editor like CapCut, iMovie, or another app built for vertical content. Import your clips, trim mistakes, arrange the best moments, add captions, adjust audio, choose the right aspect ratio, and export for TikTok, Reels, Shorts, or your chosen platform.
How do I make my videos look professional?
To make your videos look professional, focus on clean sound, steady footage, intentional pacing, useful B-roll, readable captions, consistent color, and a strong opening. Fancy effects matter less than clarity. A simple edit with good audio and strong structure usually feels more polished than an over-edited one.
What are common video editing mistakes?
Common video editing mistakes include starting without organizing footage, keeping too many weak clips, cutting every pause, ignoring audio, overusing transitions, adding random B-roll, grading before correcting color, using unreadable captions, exporting in the wrong format, and skipping the final full-video review.
Ready to make your next edit easier?
Editing gets easier when you know what to cut, what to keep, and where your tools can save time. Async can help with the parts that usually slow creators down, like captions, reframing, clipping, and repurposing, so you can spend more time shaping the video itself and less time rebuilding the same edit for every platform.